Showing posts with label Frugal living. Show all posts

Tuesday, December 10, 2013

Homemade LIQUID soap


There are so many sites out there in the internet-world describing how to make liquid soap - and most of them can be described in one word:
COMPLICATED.


Seriously? The same bar soap just liquified needs to be THAT hard?


I think not.


The problems with what is out there:

1) store-bought bar soaps (and many soaps bought online, but not all) have the glycerin removed during the soap-making process. Therefore glycerin needs to be added back in to the soap to help it "be" liquid.

2) Alcohol and other additives can be DRYING. These are not necessary - neither for preservation (most liquid soap keeps itself preserved, or one can use particular essential oils for preservation - vitamin E is great too) nor for any other reason (I had a second reason but have now forgotten it).

3) Starting with liquid soap kind of defeats the purpose. Seriously.

4) Dr. Bronner's Castille soap is great - but a little secret: castille soap is simply olive oil soap. Guess what!? You can make that at home.

5) The ones that do provide a recipe from scratch, want you to use a different form of lye - Sodium Hydroxide (NaOH) instead of what is typically used in bar soaps: Potassium Hydroxide (KOH). I do NOT understand this. I have put out some requests and have heard no responses. If YOU know why, please respond, because I genuinely want to know the reason why a different form of lye would be needed for liquid soap.
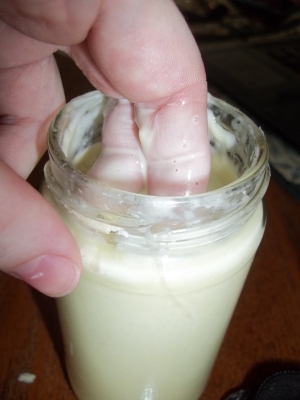
Now. Why would you want to start with bar soap (that was liquid during the soapmaking process to begin with) and liquify it? Because not everyone can have lye around. It's dangerous stuff with little ones or if you don't have the greatest coordination. I think I'm pretty decent and I've had a couple of minor incidents with yellowed curling finger nails and one spot on my arm. All is well now, but it was pretty scary (and stinky). If you cannot have lye in your home, purchase a "full body bar soap" - this is MY terminology alone, not an official label. What you are looking for is a simple, all-natural soap containing ONLY the ingredients YOU want (you can add more if you want during the process, but make sure there is nothing in there you DON'T want) - and make sure the glycerin has not been removed (this is what I call "full body" - it's all the soap, nothing removed). Grate it up into a saucepan and add twice as much water as the amount of soap you have. Bring to a gentle simmer and stir almost constantly until the soap has melted - add any additional ingredients you want. Allow to cool - if it gets too thick, warm it back up and add water about 1/2 to a full cup at a time (you can gauge the amounts based on the thickness - very thick, add more water; getting close to what you want add less at a time), stirring and cooling until it gets to the thickness you like. After a time or two making it like this, you'll recognize the thickness it needs to be when "hot" to be the consistency you want when "cool". This is how I always used to make our soap.


So how do *I* make liquid soap now?

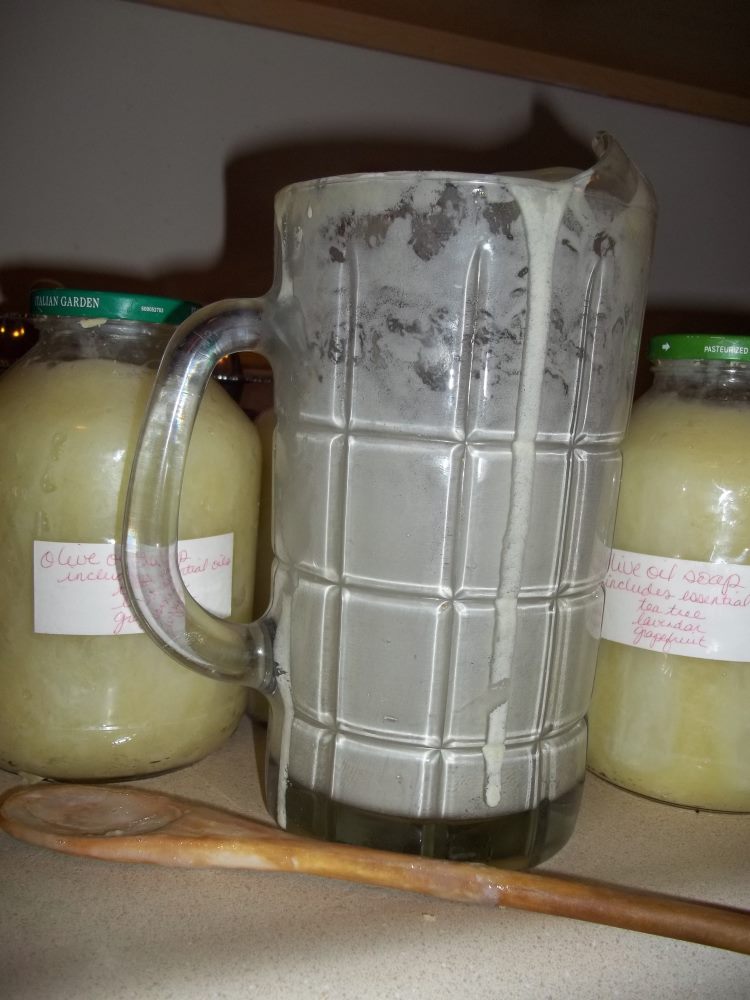
[caption id="" align="alignnone" width="270"] Those of you who visit my home and recognize the pitcher: Rest assured I do watch it. Remember that my alternate dish soap is this SAME soap plus coconut oil soap. It's JUST soap ;)[/caption]
 

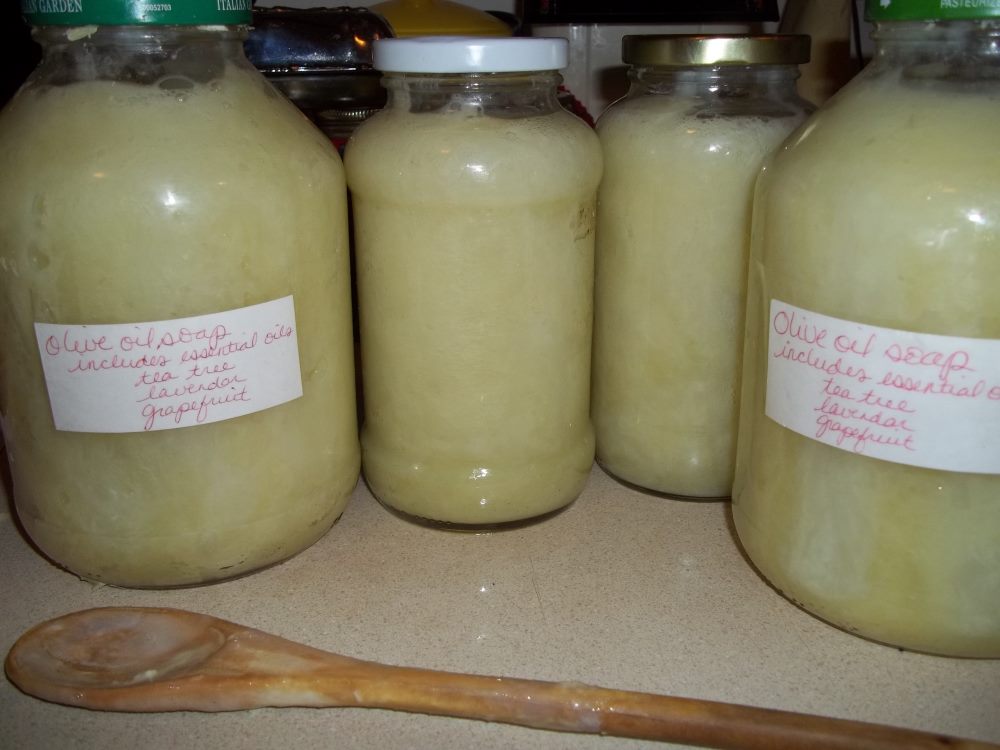
[caption id="" align="alignnone" width="360"] I had 2 more of the "smaller" jars as well. From that one pitcher of soap!!![/caption]
Start with making olive oil soap, adding the highest amount of the required range of water. When any soap is made, a typical lye calculator will give a range of water amounts to use - use less if you want to set up faster; more if you want it to set up slower. Olive oil soap takes a while to set up anyway, so I typically use on the lower end if I am making bar soaps. For a recipe of 32 ounces of olive oil, I need 4.2 oz of Sodium Hydroxide (lye) and 8-12 ounces of water. I made a recipe last week with 15 ounces of water (I didn't want to over-do it because I did want the oil and lye to be close enough to saponify well. This all perfectly fit into my beautiful glass pitcher.

I used a stick blender to bring it to trace, but I used to wait and stir and wait and stir - sometimes up to a full day to get the olive oil soap to trace. I LOVE stick blenders ;)

Then I separated it into two large old spaghetti sauce jars, filling each about half. I filled the rest with water and stirred. Added essential oils (in this case I used lavender, tea tree oil and grapefruit essential oils as well as vitamin E - to personal scent-preference). Let it sit. Stirred the next morning - it was THICK. Poured some out into 2 other jars and filled up with water again. Within 12 hours: thick again.


Poured into 2 more of the smaller jars and some into our current soap dispenser, adding more water to bring it to consistency in the dispenser.


The stuff in the glass jars is still thick though very close to the consistency I want and I will thin it as we use it.


That is a LOT of soap - for almost NO work. Next time, I'll stick with 16 ounces and I'll probably fill up this same amount of jars with soap at the proper consistency.


I didn't use any of the complicated process (one site says you can't make liquid soap using cold-process soap-making - ummmm, this is my second time making liquid soap from scratch and the ONLY way I like to make soap is the cold-process version. I abhor heating it up and dealing with the curds - I do it only when absolutely necessary - and liquid soap-making from scratch works just fine in cold-process, thank you very much).


I don't do any of the other more complicated steps, because frankly - this method WORKS - we are getting ourselves clean - it is simply liquified versions of my bar soaps - so why would I go to more trouble for a liquid than I do for the bars?


Lazy Mom syndrome again ;)


Or maybe I just want to spend time with my son....


;)


Wednesday, September 25, 2013

Homemade Hand-Soap

I have been asked a lot lately - now that I've finally found a homemade hand-soap I *really* like -
"Why do I make my own hand-soap when I can buy off-brand hand-soap for so cheap?"


Because it's even cheaper. And could be even cheaper than I do it now.

Because it's FUN! Just enough of a challenge - and a bit of danger (I start from scratch with oils/fats and lye).

Because of the trick of getting just the right essential oils to provide the benefits we want the fragrances we like. (Tea tree oil takes serious getting used to!).

Because I'm not paying for junk: triclosan, fillers, artificial colors, artificial fragrances, alcohol, added glycerin when the full-base soap is more moisturizing anyway, and who knows what else.


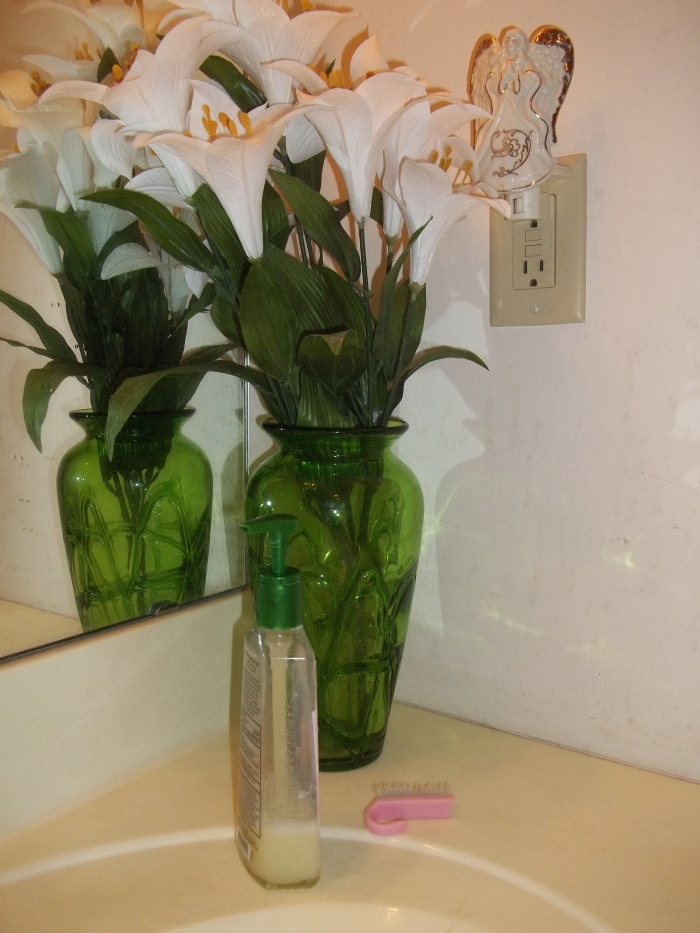
For right now, I am still using old pump bottles from Christmas/catechist/Easter/end-of-year-teacher gifts - when these wear out, I'll come up with a more creative solution.


My little corner of beauty and peace:


Sunday, June 9, 2013

Chocolate treats - FAST!

Glorious chocolate ;)


http://healthimpactnews.com/2012/how-to-make-irresistible-coconut-oil-chocolates/


Add 3-4 tbsp of honey or maple syrup instead; and at least make sure you have a full tsp of vanilla.

Our final version:

Simple Coconut Oil Chocolate Candies


  • 1/2 cup Tropical Traditions Coconut Oil

  • 1/4 cup cocoa powder (raw cocoa powder is preferred)

  • 3-4 Tbsp raw (preferred), local (if at all possible) honey or maple syrup

  • 1 tsp vanilla extract (optional)


Melt the coconut oil and add the honey. Whisk and add the cocoa powder. Whisk occasionally while pouring into a silicone ice cube tray or silicone mini muffin tray. Makes 12. Cool for 30 minutes in the fridge or freezer.

Note: Time varies depending on how hot the coconut oil was when you started. If the oil is only just reached its melting stage, these will set in as little as 15 minutes.

These were just the perfect first use of our silicone shaped-trays - perfect for candies, soaps and ice cubes! A young child could melt these over a hot cooking pad, or in a pan of warm water - the coconut oil liquefies at room temperature, so you just need to get it slightly warmer than that (so the other ingredients don't harden it up while stirring and pouring). The quantity is perfect for a child's first recipe!

Delicious! Perfect for Once Upon a Time withdrawal symptoms.... ;)


Legoboy spilled some; I spilled some more. No problem!
Still delicious!


Popped out of the tray - I love these silicone trays!


Saturday, December 1, 2012

Best Homemade Frosting!

If there is one thing I need with any recipe in this household - it better be EASY!

I have never held "exactness" high on my list of things to be appreciated - especially when it comes to food, cleaning and organization. Flexibility - yes! Now there's a word I can put on the "appreciative" list!

And this recipe cuts to the heart of it - it is easy on the budget, easy on the need for not one drop of high fructose corn syrup,  easy on sweet cravings, easy to modify and so easy I've never written a recipe card for it!

I just made a batch sitting at the computer - my son brought me the ingredients and I mixed it up (he could have too - but I munched while mixing ;) ).

Take a block of cream cheese (ANY amount will do) - drop it into a bowl (the bowl in my photo was a bit too small for the 3/4 block of cream cheese I had). Let it come to room temp. When it is close to room temp you could microwave it for just a few seconds (yes, this is one of those rare times I *might* go turn the circuit breaker on for the microwave and use it for the 15 seconds).

Once warm, add in an equal amount of powdered sugar. A tsp of your extract of choice (tonight was almond extract - we've also used vanilla extract) - or larger proportions of other flavors, in quantities to suit your taste: cut up strawberries, 1/4 part powdered cocoa (or melt some chocolate into it), peanut butter in varying quantities - whatever YOU want.

[caption id="attachment_1004" align="aligncenter" width="300" caption="unmixed - almond extract, sugar and cream cheese!"][/caption]

Stir to your desired consistency. The thing with cream cheese is that it is hard to stir until the powdered sugar is mixed into it - so start with the powdered sugar and pull in sections of the cream cheese at a time - or just use a blender (lick the beaters!!!).

[caption id="attachment_1005" align="aligncenter" width="300" caption="ready to go!"][/caption]

MMMM. Yum!

Spread on your serving platter of choice - tonight will be homemade, gluten-free pumpkin bread (we ran out of glaze for it so we made the frosting to put on our slices ;) ). Graham crackers, muffins, cupcakes - or whatever you like!

Now, this version is not particularly overly sweet - it will NOT be as sweet as the hot fudge topping ;) The nice thing though is that you can mix up this basic batch - starting with the minimal of flavorings and sweeteners - and increase your sweeteners and flavoring in small quantities until you reach the amount you like. Then just make a mental note of how you liked it and make it that way later! For example, if I want something sweet, I will do the sugar about 1 1/2 times the amount of cream cheese. Or I will do slightly less and add some honey. Fruit always makes it sweeter.

You can also substitute apple juice concentrate (easy equivalence: 3/4 cup of any juice concentrate is equal to 1 cup of sugar) - but it makes it runnier, so this is best done if you're going to be adding other dry or thicker ingredients - like cocoa and peanut butter ;)

Yes, I am making my own cream cheese upon occasion, but whenever it goes on sale for $1/block or less, I buy it - organic or not! Frankly, it's just better on the TIME budget that way! But any more than that and I make it.

Tuesday, November 27, 2012

Hot Fudge Topping - NO HFCS

Hot Fudge ice cream topping - or by the spoonful ;) (sh - I won't tell!)

I have really enjoyed the chocolate syrup recipe I discovered a few years back, but tonight I was in the mood for something different - thicker - gooier - hot fudge topping!

But there is always the dreaded high fructose corn syrup. Sigh.
I have come to the conclusion that such concoctions as HFCS are poison to ALL human bodies; it is just that some bodies can cleanse themselves better. When I have it tiny quantities (and not within about 9 days before the start of my cycle), I do just fine - maybe *slight* fatigue. Any more than that, and I am fatigued like I've someone unplugged the energy plug from me - like a deflated basketball. Thud.

So I started the dreaded web search - how long would it take me to find the perfect recipe?

  • NO HFCS.

  • Simple to make - even my son could make it.

  • Few ingredients - and all-natural. (white sugar is ok)

  • Ideally pure ingredients - as in the ingredients listed are just one ingredient by itself (for example, "bittersweet chocolate" has more than one ingredient, so that wouldn't work - see, then I'd have to check THOSE ingredient lists and that's just getting too much for what should be simple and basic)

  • And it had to end up being cheaper than buying all-natural at the store (I am good with it being it more expensive than the HFCS-laced stuff if necessary)


Was there ANY hope for me!?

I FOUND IT!!!!


http://www.foodess.com/2011/08/cocoa-hot-fudge-sauce/

Cocoa Hot Fudge Sauce


  • 3/4 cup sugar

  • 1/2 cup cocoa

  • 1/2 cup heavy cream or milk

  • 4 tbsp butter

  • 1 tsp vanilla

  • pinch of salt


1. In a large microwave-safe bowl, combine sugar, cocoa and cream. Cook on high 2-3 minutes, until sugar dissolves and mixture boils.

2. Stir in butter and cook on high 2-4 minutes more, watching closely and stirring every 30 seconds or so, until mixture thickens. Stir in vanilla and a pinch of salt.

(I made mine on the stovetop - obviously ;) - see images)

[caption id="attachment_991" align="aligncenter" width="300" caption="That is an 11.5 oz jam jar of hot fudge sauce - completely full - and then some in the pan (we'd already eaten some on a bowl of ice cream each - so perhaps 14 oz altogether? with some left for scraping ;) )"][/caption]

[caption id="attachment_992" align="aligncenter" width="300" caption="Trying to show the thickness - I think a video would be needed for that though!"][/caption]

This stuff is SO DELICIOUS! I think I should boil it a bit longer to get it thicker, but as it cooled (still warm) it was quite thick already (please note, I did not boil it as long as the recipe says - I should have!). I was still separating turkey meat from bones in between making this hot fudge topping that the hot fudge was done before I was! It was THAT EASY!

Legoboy is already making plans for the jam jar we have so we can use it up and HE can make it ;) I think I'll have him add about half cup of peanut butter to it too next time - just for kicks!

(ETA: If you add peanut butter, decrease the regular butter by something - not sure how much - we did make a second batch - and the regular butter has separated out - probably too much oil from the butter AND the peanut butter together).

(I suppose I should note that most of these posts are scheduled out in advance - I sit down and write a bunch of posts in half an hour and schedule them out - so no, a week later I am NOT still caring for the Thanksgiving turkey ;) By the time you all read this, the turkey is safely in the freezer (or consumed! yum!))

Sunday, November 25, 2012

Use it up!

Otherwise known as "waste not, want not." God instructs us to be stewards over the earth:
God blessed them, saying: Be fertile and multiply; fill the earth and subdue it.

With these words, we are given the gift of God's own work. Not a one of us is worthy.

In exploring these themes in the CGS atrium, in our Bible studies and in our prayer life, my son and I have been doing all we can to use the gifts with which God has blessed US. Carefully, judiciously, always putting relationships with people first.

Well, in the food world - I got brave this year. And I cooked up the turkey gizzards too. In past years I have saved them for other people. I still had two packages in the freezer from several months ago, so I added them too. Wow, that was a LOT of meat! By the time I cooked it all down and shredded off all the meat from the next, that was more than enough for the gravy, but I kept going! I chopped up all the parts and mixed them back in, except the liver which I tasted and still couldn't stand (a stray piece still got in and I had it in leftovers on Saturday - even with lots of water and lots of delicious leftovers, it still left a nasty taste in my mouth for about 2 hours). So that is back in the fridge for something else (I'm up for ideas!).

And oh MY! Did the gravy have way too much meat (keep in mind this was gizzards times 3 ;))

[caption id="attachment_986" align="aligncenter" width="300" caption="This is room temp - so congealed, but it's barely runnier as warmed up gravy! "][/caption]

[caption id="attachment_987" align="aligncenter" width="300" caption="Small pot: rest of the neck bones; large pot: rest of the turkey bones"][/caption]

Yes, that is a plastic bin for the turkey you see - it is one of two last pieces of plastic in my kitchen (my spatula handles are a hard rubber; as is the bulb on my baster; all bowls are metal or glass --- but I do have a plastic lid for a small rectangle glass baking dish into which I put slightly warm or room-temp items for transport). This is a tupperware measuring container with a pour spout, with a lid that has a little flip-cap for the pour-spout. It was (my maternal) Grandma's and I have fond memories baking with her as she used this for measurements... I only put in the gravy when it is warm, not hot or boiling, to minimize plastic exposure and I usually use it for pancake batter - it's perfect for my son to mix up the batter in and use to pour onto the griddle (see previous pancake post!).

So we're boiling down the rest of the bones to get all the rest of the meat bits - and to get some turkey stock to freeze for future use. I love my pint and quart mason jars! I've started using them for everything, even though I have a cupboard full of peanut butter, jam and sauce jars! Probably because the  mason ones can seal more properly; and I'm not purchasing jam and sauces anymore anyway (still some peanut butter because we can't seem to get any allegedly raw peanuts to sprout - more on that another day!).

The remainder of the bones then can be used in our homeschooling for a variety of purposes (science and art come to mind - anatomy, parts of the bones, archaeology), but I am entirely up to more ideas!

Tuesday, November 6, 2012

Sour dough... mmmm....

Several months ago, a friend from our church offered us some goat milk - fresh - raw - YUM!!!! We made yogurt and cheese and just LOVE IT!

This same friend also offered goat milk to another friend we have. He and his girls were supposed to make yogurt or cheese or something with it - he even went to the store and tried to buy cheesecloth (I ended up giving him some muslin). I recall they did do something with it all, but I don't remember what... ?

I do recall that he left it in the fridge so long (a habit over there) and it started to go sour. So he got this brilliant idea (hey, I may have thought of it too if I didn't know any better, so please excuse my sarcasm here ;) ) that one goes about making "sour dough bread" with "sour milk".

Ahem.

(that would be a "no")


So anyway. He went to the library and checked out books on how to make yogurt and cheese and... sour dough bread.Now, in his defense, there are people in our area who "make" "sour dough" bread but it is NOT sourdough bread. There is a huge difference. A huge historical difference, a huge health difference, just a HUGE difference!

Well, first off, those books overcomplicated the entire cheese and yogurt process. I gave him a stripped down version of those processes and he made a few things with success.

He did learn that one does NOT use sour milk to make sour dough bread - and that sourdough bread is actually one word on the "sourdough". He did not like the book and wanted to get rid of it right away. I convinced him to let me finish reading it first.

[caption id="" align="alignnone" width="239"]Classic Sourdoughs - A Home Baker's Handbook He had checked out the older edition of this book.[/caption]

I fell in love with the book! Went to the website and months later finally bought some of the sourdough starter in powder form... and it sat in my fridge until I could get jars. Then it sat in my fridge until I cleaned those jars out and went looking for the instructions (never did find them). Then it sat yet another week until I finally went BACK to the website to find that the instructions were included there for free. Yay! So 9 months after discovering it, and 6 months after purchasing the starter, I was ready!

[caption id="attachment_962" align="aligncenter" width="300"] Here they are at first feeding - just getting started :)[/caption]

[caption id="" align="alignnone" width="185"] One of the jars after the second feeding (had it started; then 24 hours in added a feeding - this is the following morning; when the other one exploded - leaking sourdough all over - AWESOME!)[/caption]

[caption id="attachment_964" align="aligncenter" width="300"] I awoke to what sounded like a mouse having a feast on Halloween candy under our dishwasher. It turns out to be the sourdough starter oozing, bubbling and otherwise popping out the sides of the loosely attached lid! Very funny to see! Not so funny to have lost sleep over it! [/caption]

[caption id="attachment_965" align="aligncenter" width="300"] Scooping from one jar to another - as runny as it looks, that is actually sticking together quite well![/caption]

And it's ALIVE!


I have moral issues with tossing the halving down the drain - so it's being split into multiple jars until I get a chance to bake with it. I should bake with it NOW but I want to experiment first ;)


Wednesday, October 24, 2012

Homemade Vanilla


The resident child (hehe) has been studying a bit about herbs of late. And it has been on our plans to make homemade vanilla extract for quite some time.


Obviously, not something he can do on his own... He can cut the beans, he can drain the extra fluid, he can drop in the beans, label it all and seal it up, he can store it.


But I had to make purchase. My first alcohol purchase of my life! The things we do for our children! It does seem ironic I just purchased an alcohol for my son, though!


(for the record, I am not opposed to alcohol, I just don't tout it or drink very much, and I have not had a reason to purchase it before now.... wait.... when I lived in Belgium, I bought some wine to bring home to family, but that was a different culture - alcohol was out with the sodas!).


Grandma was given this kind of rum/vanilla; and we

were so happy to find it stocked at Kroger.

It has fantastic flavor, so we are excited!

The beans we purchased from Mountain Rose Herbs:

http://www.mountainroseherbs.com/search/search.php?refine=y&keywords=vanilla&x=0&y=0

We have the "1oz Vanilla Bean organic and fair trade" and it smells right! ;) I do wonder if we got quite the driest beans (apparently you are supposed to use grade B beans - but I also wanted fair trade, etc). These seemed more most than I anticipated. So we'll see. Either way, it will work from what all sources say - it's just a nuance ;)

He has been looking at the history of the use of vanilla - and true to Montessori style, we want to look at the PEOPLE involved. Most fascinating is that a 12 year old child worked out how to hand-pollinate the vanilla so that it could be grown outside of the Latin America countries.

Forget gold and corn and other such things - the greatest gift that the Europeans found in the Americas: VANILLA!

Ever had chocolate without it?

We did! Never again, thank you!


Vanilla brought chocolate to the impoverished Europeans! And now they make the best chocolate in the world. One plant changed the world! One little boy's discovery!


Tuesday, October 23, 2012

Drying Mint

We are trying to be good stewards of the earth, while not letting the earth get in the way of the most important gift of human beings: relationship.

It is even better when the two are the same thing :)

In this case, we are growing mint in our living room. As it grows long, we trim it, hang it to dry, grind it up and make tea... and more... While it is drying (upside down so the oils flow back into the leaves, maximizing their potential), we have a beautiful decoration that makes our home, truly homey. Comforting. And there is a natural inclination towards being with one another in a cozy, homey home ;)

Once it is fully dried, we spend time together pulling the leaves off into a large bowl (easier to collect everything then, transfer in small quantities to the mortar and pestle). I bought a set of 3 of these on Amazon years back (affiliate link there) that have been simply fantastic!

The mint leaves are stored in a jar to use for making tea, or to add to our homemade toothpaste or anywhere else we need some mint flavoring.

That leaves the stems - which are fine for adding to the composting, but well, we have an interesting set up with our apartment management and mouse-traps get pricey when management does little to alleviate the issue. But fresh mint keeps them away.

My mother will cringe when she reads that I tuck these stems in all the places where the mice have been spotted. Despite her cringing, I can confidently report success (so far!) - ice-free and my home smells so nice! We freshen them up when we harvest new mint and THEN we compost the stems. There may be other purposes for them, but that is what we do for now :)


mint, dried, laying on the stove

because our counters were full at the time.


grinding mint leaves with mortar and pestle

Friday, October 19, 2012

Once a Month Cooking - October

I have been serving as test cook for http://onceamonthmom.com - and we LOVE so many of the foods.

I like having the recipes all laid out for me, with instructions and a complete shopping list.

As a user of the site, I can just follow along and at the end of the day, I have more than a months' worth of food in my freezer and fridge (we make 4 servings, thus doubling up - 1 month of cooking usually lasts us 3 months, with our typical fill ins of peanut butter and jelly, other favorite foods, visiting elsewhere, and our other favorites).

As a test cook every few months, I get to make sure all amounts and instructions are correct for YOU the end-user.

I never do take as many photos as I intend to. The cooking is pretty intense - and so satisfying when it is done!

[caption id="attachment_923" align="aligncenter" width="225" caption="breakfast cooking - these sausages were SO YUMMY! Definitely a "do 'em again, Mom!""][/caption]

[caption id="attachment_925" align="aligncenter" width="300" caption="MMMMMMM........ (ok not so mmmm when raw; but they turned out fantastic!)"][/caption]

[caption id="attachment_924" align="aligncenter" width="300" caption="In-progress"][/caption]

[caption id="attachment_926" align="aligncenter" width="225" caption="Peanut Butter Hummus - my son pointed out the layers, just like the layers of the earth and the density of liquids - so we had to take a photo!"][/caption]

Sunday, October 7, 2012

Mean Mommy ;)

Yep. I'm a mean mommy.

If by "mean mommy", one uses the definition: a mother who holds true to her personal principles and strives to raise a child into an independent adult.

Note that this definition does not pass judgment on any other mother, or father for that matter, in any way, shape or form. This definition simply says that in this fallen world of imperfect human beings, each parent strives to their best job raising the child(ren) entrusted to said parent, in the best way that they can.

I personally would not want to raise a child based on principles I don't believe in. And I would RARELY judge another parent for choosing to raise a child according to their own principles, which may be wildly different from mine. The exceptions: physical and emotional safety. If you're going to beat your child and lock him in a closet for days on end - yeah, I'll judge. I can be totally honest about that.

If you raise your child eating ice cream for breakfast - I'll buy the ice cream on my way to your house for a morning play date! Because that is YOUR choice as a parent! (ok, in that case, it happens to be mine too - Saturday morning ice cream is something of a tradition around here - but let's see... if you choose to raise your child in a home where all the children have the same first name (Foreman family comes to mind) or the same first initial (Duggars) - that's up to you!  I won't be going there, because that's not my place.

You want to send your child to a particular school, or not, or unschool or not, or homeschool or not - or do some funky combination of all sorts of schooling. Have at it!

But I am a mean mommy. Why? Because of an arrangement my son and I agreed upon. I shared this agreement on Facebook and received some borderline hate mail. All private thus far, but really!? Why!?

It comes down to finances. On principle, I do not believe in a free-ride in life, despite anything a particular extended family member might have to say about me. I do believe in love/charity and making oneself a gift to others - but a gift to others does not equal a doormat, and when children are involved, the best time to learn responsibility is from a young age. That does NOT mean slave labor, folks! It does not mean "no fun!"

It means that I provide all the necessities (true necessities!) of life, plus a lot of the "wants" (some Americans consider these "wants" as "necessities" and that is where the "mean mommy" syndrome comes in):

Necessities:

  • routine healthy meals, appropriate clothing to the season and age, suitable shelter

  • education and educational supplies for core subjects, which includes basic art


Wants/Extras:

  • enrollment in "electives" - extra educational options that are directly related to the core subjects or ones that I deem as "required" in our household - more art is included here

  • lots and lots of books - reading material for the fun of it, as well as educational options

  • Netflix and similar services - both for fun and for education

  • daily desserts and treats that are not so healthy ;)

  • transportation to/from scheduled events (tae-kwon-do class 2-4 times a week, speech class, tournaments, belt tests, playdates, museum trips, lego store monthly builds, home depot kids workshop monthly - just to name a very scant few)

  • use of digital camera and video camera

  • use of the computer to play a browser-based history game


So the rest of the mean mommy???? My son and I have agreed that HE has to pay for the following:

  • any and all treats above and beyond what I would ordinarily provide - we do a lot of food-related mystery shopping and I like my treats too - so it's not like he is deprived in *any* way of routine junk food!

  • he pays for almost all lego purchases from his own money (he also receives gifts from me and from others on birthdays and christmases) - this "gift" and "earn" mentality has led to him being quite generous with gift-giving. He saves his money and initiates conversations with people - "So if you could have anything for Christmas, what would it be?" and he does what he can to make it happen! You should see his gift-giving list just for this year alone! It is HUGE. Much longer than what he is asking for!

  • Desired purchases that do not fit our household budget. His first big purchase? Lord of the Rings Extended Edition DVDs. At $75, we couldn't afford them, when we had a perfectly good set of widescreen editions. So he saved up his money; and bought them. When we went to order them online, the price had dropped to $49 - so he had an extra $26 to put towards his next purchase: Kingdom Lego sets. That was 2 years ago. Those are still valued items for him and he has set up longer and longer term goals for himself.

  • Tae-kwon-do tournaments. Half the tae-kwon-do belt test fees. Keep in mind, I pay for a uniform each year (all he needs, although this year joining STORM team, means an extra uniform due to the change in color); I drive him to every event; I provide services for the fundraisers and make sure all is in place for his continued practice and growth. I pay for his YMCA membership and his godfather covered the tae-kwon-do class fee itself. So the extra fees are not all bad for a young man to cover.


And we still have a house full of STUFF. Yick. So he's not lacking in good old American consumerism! Despite my mad attempts to the contrary!

He takes on odd jobs with family and neighbors; he works on projects for me; he receives birthday and Christmas money; he helps to sell items that are useful to someone else but not needed here.

He just seems to be growing into a strong spirit of working hard and sharing the fruits of his work with others - because he CAN; because the work and therefore the fruits are truly HIS to *truly* give to others. Yes, he comes to me for guidance (he IS 8 years old after all!), but for the most part, he is free to share his fruits - instead of hording it all for himself because mommy gave it to HIM and him alone; or because "I know I can get more, so I don't care if I give it away." He gives because he has true ownership. He only asks for something from others when he hopes to have something to give in return. He is empowered to know he CAN work, that his work is valuable, and that he can take care of business.

If I am waffling on a purchase for his schooling or for fun and saying "well, I'd be willing to pay x-amount, but the price is y-amount", he calculates the difference himself and if he wants whatever the item is, he brings me the difference and covers it. I never ask for that!  Most recently, that happened with a museum center membership. Turns out, I got an educator discount so I returned the money he offered me, but he was still wanting to let me keep it anyway, towards the membership, just to be of help to me. I did give it back anyway, and he re-distributed the money back into other goals.

I did not teach him those things. I take no credit. I do take credit for working WITH him.

Yep. Mean Mommy. If that is defined as all of the above, OK, you've caught me ;)

Wednesday, July 4, 2012

In Full Bloom: Our Balcony Garden

Ok, two things are in bloom!

But it's ALL so beautiful!

(note to Grandma: please click on each image to see it full-size - the settings here cut down the photos) :)

[gallery order="DESC" link="file" columns="2" ids="834,835,836,837,838,839,840,841,842,843,844,845,846,847,848,849,850,851,852,853,854,855,856,857,858,859,860,861"]
Enhanced by Zemanta

Saturday, March 10, 2012

Cream Cheese - Homemade

Ok, I finally hit sticker shock on grocery prices. $2.04 for one little thng of cream cheese???? I don't know what it was previously, because I always bought it when it was $1/packet on sale.

And Kroger has the nerve to label that $2.04 "Low Price".

Note: "Low Price" at Kroger = they've recently *raised* the price. Problem is, it's the same color as their sale price stickers.

SO. We're making one more thing at home. And this one is EASY-EASY-EASY!!!!! The KIDS can make it!

TOOLS:


  • Pot on the stove; or crockpot; or bring everything to room temp in closed containers

  • wood spoon

  • colander

  • bowl into which the colander fits

  • muslin cloth or cheesecloth or buttercloth

  • containers in which to store your yummy cream cheese (we use glass jars)


INGREDIENTS:


  • 1 quart fresh milk

  • 2 teaspoons salt

  • 2 tablespoons white vinegar


Directions:


  1. Bring milk and salt very slowly to a boil (or bring it all to room temp in closed container.

  2. Remove from heat and stir in white vinegar (this makes the curds separate from the whey).

  3. Leave to cool (if heated).

  4. When cool pour mixture into a muslin bag and allow to drip. You can also wrap it up and squeeze.

  5. The whey is collected in the bowl - store this separately.

  6. The cream cheese is at its best if you place it all in a food processor or blender for a few seconds (add tiny amounts of whey at a time if it's too dry).

  7. Store in small containers in the fridge. Use within the time your milk would have expired.


Whey: Can now be used as buttermilk or in other recipes (pancakes! or anything calling for milk where you don't need too much fat)

Cream Cheese: Can have other flavorings added for a variety. Experiment!

Monday, February 27, 2012

Twenty Minute Showers

Yep. That's right. I'm a glutton. I take 20-minute showers. When people hear the number 20, I know what they are thinking (wasteful of resources, wasteful of time, glutton, consumerism....)

I also shower the entire time with my eyes closed. Why!? Because water in my eyes stings. No, I'm not ultra-sensitive to pain - I am ultra-sensitive to sensation though - I did manage to give birth with no interventions and can honestly say, it was not the worst pain I've ever felt, not by a long shot!

So back to the showers. I'm blinded the whole time, I invariably still get water in my eyes and yet I take showers that long?

Well, now let's look at the bigger picture - I do a (homemade, crocheted cotton) washcloth bath every day with a small bowl of water; a larger bowl once a week to take care of the hair. I only actually shower once a month.

It saves on resources, saves on time, ensures I'm being ecologically-aware, doesn't dry out my skin (showers dry out my skin and especially my face, which then produces MORE oil than necessary, leading to acne; I rarely wash my face because of the acne issue - once the oils balanced out, it stays clean with a splash of water 1-2 times a week - I don't wear make-up or other items that need to be washed off either); and allows me one indulgence: a 20 minute hot shower massage, once a month.

If that's gluttony, bring it on!

;)

Saturday, February 4, 2012

SHHHHHH! Currclick has a secret!

Latest from Currclick:

Welcome to our Winter Whisper sale!


Right here, a secret page of our website, our Winter Whisper Sale and Giveaway is going on. TEN freebies are being given away, and TWENTY of our bestselling publishers have discounted all their resources by 50%, and NOBODY knows about it but you.

It's hard to keep a secret though, right? Don't worry, we won't make you. You can tell your Facebook and Twitter followers, your co-op, your neighbor, your newsgroups, even your strange Great Uncle. The only thing we ask you NOT to do is post the details on our Facebook page.

And what are the details?

  1. The URL for the sale is: http//:www.currclick.com/cclick_wintersale.php. (be sure to click the link above, log-in, THEN go to the sale URL!!!!!)

  2. Give the secret URL and details to whomever you like. Encourage them to start whispering too.

  3. VERY IMPORTANT: Because this is a secret sale, sale items must be added to your cart from the sale page. If you add an item from another product listing, and not the sale page, you will not get the sale price. However, we'll note your Whisper savings in your cart, so you can be sure.

  4. CurrClick's Winter Whisper Sale ends February 16th.


People say that word of mouth is powerful in the homeschool community. Let's find out!

The CurrClick Staff

Friday, February 3, 2012

CurrClick Affiliate

I am now a CurrClick affiliate - be sure to click on the banner ad to the right column OR this link when you are going to purchase something (you have to go through this link every time or I don't get credit....)

CurrClick

--------------------------------------------------------------------------------------------

Our current top favorite: The Celestial Almanack from Classical Astronomy - only $3 per month for user-friendly nightly information on the sky (and even daily information!) - my son LOVES this Almanack!

[caption id="" align="aligncenter" width="324" caption="Celestial Almanack"]Celestial Almanack[/caption]

Monday, March 28, 2011

Used Catholic homeschool books for sale - free shipping!

I have a LONG list of homeschool resources available for sale - many are used, but most are in like new condition - or they *are* new!

See this link for more information:
Used Homeschool Materials at Garden of Francis

We'll be keeping it updated as items sell or we find more to list. Half of the proceeds go towards our next year's school budget; one quarter will go to a charity of my son's choice and the other quarter (that is not eaten up by Paypal fees!) will be go towards buying materials for my son's Etsy shop.


God bless!

Practical Financial Guide for Engaged and Married Couples

I am holding in my hands a book I wish I'd had many years ago. It takes so much of the financial information I have studied and sought over the years, and puts in the context of a couple getting married (or already married!).

While the information contained in this book is not new persay, the context changed my entire perspective on the whys and hows of my financial choices.

The book is Matt Bell's Money & and Marriage: A Complete Guide for Engaged and Newly Married Couples

Matt Bell's Money and Marriage Book Cover Image


The guides included are practical, focus on "couples" - both those already formed as well as those who are courting and engaged, going through the nitty-gritty details of how to maintain separate finances until the proper time for merging, and how to make that transition.


Not only does Matt includes charts and practical questions to be discussed (along with explicit instructions as to when to *just* discuss and when to actually make decisions), he also includes ordered guides for all things financial, when to do them and the basics of how - wills, estates, trusts, etc.

Being a Christian, he also has emphasis on "generosity". The use of this word over the word "tithing" allows for the use of this book by non-Christians as well - since the goodness within all people precludes a certain sense of generosity.


Again, if you have been studying personal finance, and following people like Larry Burkett and Dave Ramsey, you won't *new* information - what you *will* find is a clear and concise organization of that information for anyone who is courting, engaged, married - or plans to be in any of those stages of life at any point in the future.


About Matt: Matt began his career as a radio journalist, with his work featured on National Public Radio, the NBC Radio Network, and several other networks. His reporting earned national awards from the Society of Professional Journalists and United Press International.


Today, Matt is a full-time personal finance writer and speaker. He is the author of two books: Money, Purpose, Joy (September 2008) and Money Strategies for Tough Times (April 2009), both by NavPress. Matt has been quoted in USA TODAY, U.S. News and World Report, the Chicago Tribune, and Kiplinger's Personal Finance magazine, has written for ChristianityToday.com, and has been a guest on WGN-TV and several nationally syndicated radio talk shows.


Matt holds a Master's degree in Interdisciplinary Studies from DePaul University, where he wrote a thesis about the emergence of America's consumer culture and its influence on people's beliefs and behaviors.


Matt lives with his wife and their three young children in the Chicago area. Visit his website and blog at mattaboutmoney.com.


Matt Bell's (a.k.a Matt About Money) Money & Marriage has just been released by NAVPress. It is a great resource for engaged or newly married couples.
Matt says about the book, “I wrote “Money & Marriage” because I believe in marriage. I’m sure it isn’t news to you that money is a very common source of stress between spouses. It’s even a primary factor in many divorces. I wrote this book with no less of a goal than to save many marriages from disaster, and to help all couples use money in a way that strengthens their relationship and increases their joy.”

To celebrate Matt has put together a Nest Egg Giveaway with a prize package worth over $250! 


One winner will receive:

•    A Free 1 Hour Financial Session
•    A $100 Visa Cash Card
•    A signed copy of Matt’s Money, Purpose, Joy and Money Strategies for Tough Times

To enter just click one of the icons below. Then tell your friends. And hurry - the contest ends April 11th. The winner will be announced on Matt's blog on April 13th.


Enter via E-mail Enter via FacebookEnter via Twitter


Be sure to pick up a copy of Money & Marriage – important principles whether you're newly engaged or just celebrated your 30th anniversary.


I received a free copy of this book in exchange for a review - the contents of the review are purely my opinion. Read what other people thought about this book by clicking over to the Litfuse Blog Tour.

Tuesday, August 31, 2010

Homemade Chocolate Syrup - the REAL stuff!

This chocolate syrup is great! It tastes and feels just like Hershey's Artificially Flavored Chocolate Syrup, except better, because it's REAL.

There is NO chocolate in Hershey's Chocolate Syrup, but there *is* a lot of high fructose corn syrup. Two reasons to avoid the stuff (and I used to drink it by the bottle - I was a kid then!).

One reason to like bottled chocolate syrup - the handy bottle! So save it for this recipe!

Now I'm not saying this recipe is healthy by any means, but at least there is real chocolate and a sugar source you can trust. You KNOW what this sugar will do to your body. I am experimenting with other natural sweeteners (honey, molasses), but we still prefer white sugar the best.

Homemade Chocolate Syrup


Ingredients & Instructions:

1/2 cup cocoa powder


1 cup water


Mix those two things in a pan and heat over medium to dissolve.

2 cups pure white cane sugar


Stir in the sugar and boil for 3 minutes. This step is *critical* - use a timer! The full three minutes thickens it up and makes it syrup, not chocolate-sugar water ;)

1/8 tsp salt (we use sea salt)


1/4 tsp vanilla (we use pure organic vanilla extract with bourbon, which boils out)


Remove from heat. Add salt and vanilla. Stir it in thoroughly.

Allow to cool (this is the hardest part - looking at all that chocolate goodness, just sitting there!). It will thicken as it cools.

Use a funnel to pour it into a storage bottle.
Place some ice cream or milk into that saucepan and don't let the remaining chocolate go to waste (I hear-tell that a finger works just as well!)

;)

Friday, August 27, 2010

Favorite Chicken Soup

We make this when we can - great basic recipe!
Favorite Basic Chicken Soup


1 soup chicken

Chicken Feet (as many as possible because they "add strength")

3 1/2 quarts water

2 onions

1 tbsp salt

2 carrots

3 stalks celery

1 parsley root

2 sprigs dill

3 sprigs parsley

Clean the chicken and feet thoroughly. Combine in a deep pot with water and oinions. Bring to a boil and cook over medium heat for 90 minutes.

Add remaining ingredients.

Cover and cook over low heat for 1 hour, or until chicken is tender.

Makes about 2 - 2 1/2 quarts of soup. The chicken can be strained out and used in other dishes for more frugal menus.