Showing posts with label Home-making. Show all posts

Tuesday, December 10, 2013

Homemade LIQUID soap


There are so many sites out there in the internet-world describing how to make liquid soap - and most of them can be described in one word:
COMPLICATED.


Seriously? The same bar soap just liquified needs to be THAT hard?


I think not.


The problems with what is out there:

1) store-bought bar soaps (and many soaps bought online, but not all) have the glycerin removed during the soap-making process. Therefore glycerin needs to be added back in to the soap to help it "be" liquid.

2) Alcohol and other additives can be DRYING. These are not necessary - neither for preservation (most liquid soap keeps itself preserved, or one can use particular essential oils for preservation - vitamin E is great too) nor for any other reason (I had a second reason but have now forgotten it).

3) Starting with liquid soap kind of defeats the purpose. Seriously.

4) Dr. Bronner's Castille soap is great - but a little secret: castille soap is simply olive oil soap. Guess what!? You can make that at home.

5) The ones that do provide a recipe from scratch, want you to use a different form of lye - Sodium Hydroxide (NaOH) instead of what is typically used in bar soaps: Potassium Hydroxide (KOH). I do NOT understand this. I have put out some requests and have heard no responses. If YOU know why, please respond, because I genuinely want to know the reason why a different form of lye would be needed for liquid soap.
Now. Why would you want to start with bar soap (that was liquid during the soapmaking process to begin with) and liquify it? Because not everyone can have lye around. It's dangerous stuff with little ones or if you don't have the greatest coordination. I think I'm pretty decent and I've had a couple of minor incidents with yellowed curling finger nails and one spot on my arm. All is well now, but it was pretty scary (and stinky). If you cannot have lye in your home, purchase a "full body bar soap" - this is MY terminology alone, not an official label. What you are looking for is a simple, all-natural soap containing ONLY the ingredients YOU want (you can add more if you want during the process, but make sure there is nothing in there you DON'T want) - and make sure the glycerin has not been removed (this is what I call "full body" - it's all the soap, nothing removed). Grate it up into a saucepan and add twice as much water as the amount of soap you have. Bring to a gentle simmer and stir almost constantly until the soap has melted - add any additional ingredients you want. Allow to cool - if it gets too thick, warm it back up and add water about 1/2 to a full cup at a time (you can gauge the amounts based on the thickness - very thick, add more water; getting close to what you want add less at a time), stirring and cooling until it gets to the thickness you like. After a time or two making it like this, you'll recognize the thickness it needs to be when "hot" to be the consistency you want when "cool". This is how I always used to make our soap.


So how do *I* make liquid soap now?

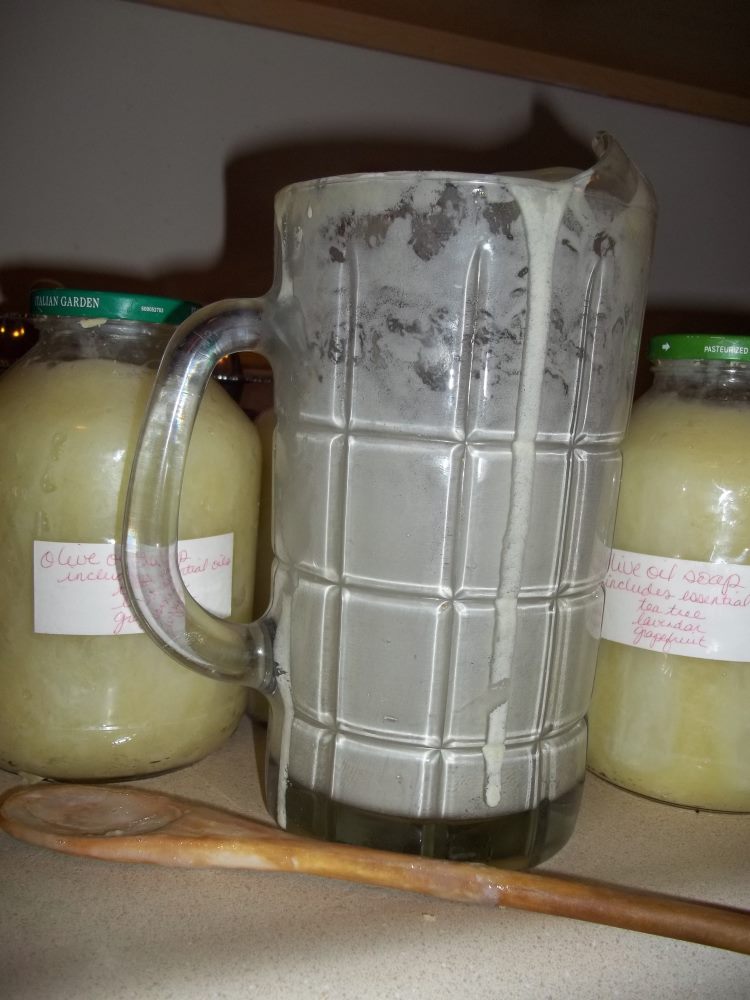
[caption id="" align="alignnone" width="270"] Those of you who visit my home and recognize the pitcher: Rest assured I do watch it. Remember that my alternate dish soap is this SAME soap plus coconut oil soap. It's JUST soap ;)[/caption]
 

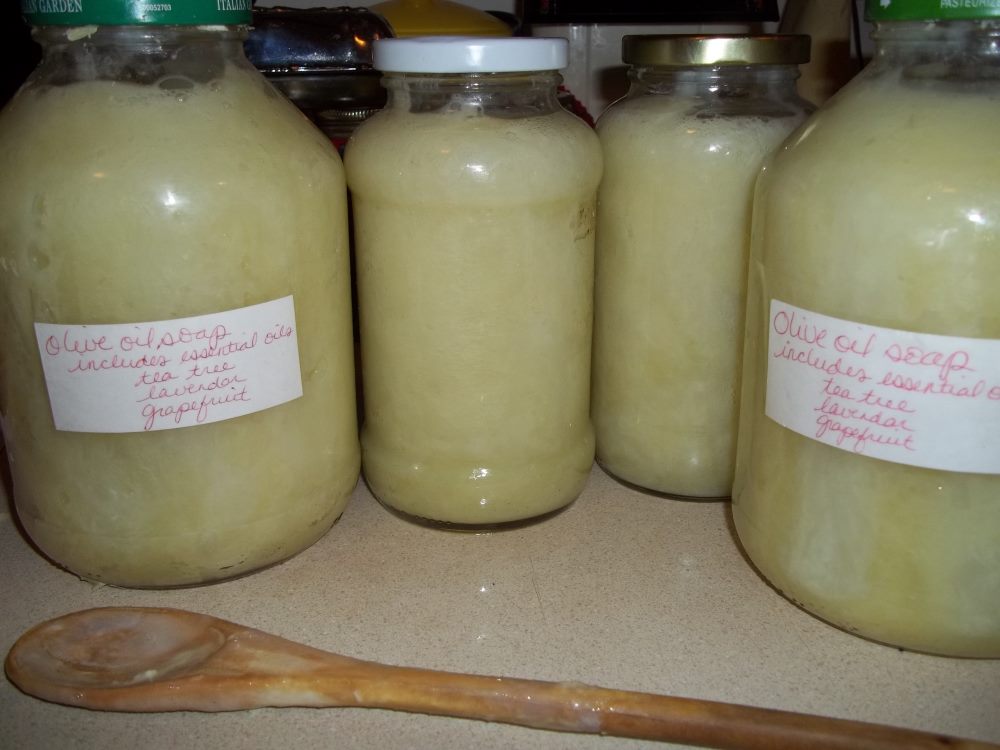
[caption id="" align="alignnone" width="360"] I had 2 more of the "smaller" jars as well. From that one pitcher of soap!!![/caption]
Start with making olive oil soap, adding the highest amount of the required range of water. When any soap is made, a typical lye calculator will give a range of water amounts to use - use less if you want to set up faster; more if you want it to set up slower. Olive oil soap takes a while to set up anyway, so I typically use on the lower end if I am making bar soaps. For a recipe of 32 ounces of olive oil, I need 4.2 oz of Sodium Hydroxide (lye) and 8-12 ounces of water. I made a recipe last week with 15 ounces of water (I didn't want to over-do it because I did want the oil and lye to be close enough to saponify well. This all perfectly fit into my beautiful glass pitcher.

I used a stick blender to bring it to trace, but I used to wait and stir and wait and stir - sometimes up to a full day to get the olive oil soap to trace. I LOVE stick blenders ;)

Then I separated it into two large old spaghetti sauce jars, filling each about half. I filled the rest with water and stirred. Added essential oils (in this case I used lavender, tea tree oil and grapefruit essential oils as well as vitamin E - to personal scent-preference). Let it sit. Stirred the next morning - it was THICK. Poured some out into 2 other jars and filled up with water again. Within 12 hours: thick again.


Poured into 2 more of the smaller jars and some into our current soap dispenser, adding more water to bring it to consistency in the dispenser.


The stuff in the glass jars is still thick though very close to the consistency I want and I will thin it as we use it.


That is a LOT of soap - for almost NO work. Next time, I'll stick with 16 ounces and I'll probably fill up this same amount of jars with soap at the proper consistency.


I didn't use any of the complicated process (one site says you can't make liquid soap using cold-process soap-making - ummmm, this is my second time making liquid soap from scratch and the ONLY way I like to make soap is the cold-process version. I abhor heating it up and dealing with the curds - I do it only when absolutely necessary - and liquid soap-making from scratch works just fine in cold-process, thank you very much).


I don't do any of the other more complicated steps, because frankly - this method WORKS - we are getting ourselves clean - it is simply liquified versions of my bar soaps - so why would I go to more trouble for a liquid than I do for the bars?


Lazy Mom syndrome again ;)


Or maybe I just want to spend time with my son....


;)


Saturday, September 28, 2013

I love vacuuming

SHSHSHSHSH!!! Don't tell my mom but I DO like vacuuming! (and washing dishes by hand - but there are caveats and working under duress and last-minute orders takes away all love ;) hehe).


I have NEVER owned a new vacuum. Most of my vacuums have been well over 30 years old when I got them - I have used them until they died and are irreparable or have passed them on to others in more need than me; the newest of the variety was a gift from a dear friend (now a priest) and lasted 8 years until a part broke on it - a part that they won't sell me online or in the repair shop but I can get the part for the OTHER side of the motor (similar but doesn't fit) on Ebay for $10 - but they will happily charge me almost $90 to to fix it. Seriously. Sell me the piece for $10 - I have the screws it needs (still in the machine) and a screwdriver and the whole 60 second it would take to fix it.


But that was a year ago and I have gotten exactly nowhere. I have a smaller vacuum with no attachments (doesn't do corners and crevices) that has been our back-up (it is a child-size vacuum, but works). That vacuum was/is bagless - and I've really been spoiled by that particular feature - no remembering to purchase bags and which size (when you've had and used as many vacuums as I have, with all the housecleaning I've done... they all blend together - and you learn to retrofit bags with ease). ---

About every other month I go through the corners with my fingers, paper towels and vinegar (and those who know me well, know that I ordinarily go through ONE roll of paper towel approximately every 5 years). Yeah, it's not been satisfactory around here, but I thought things were clean enough. 


Until I got my new toy. I know I could have gone far cheaper, but I used the model one step below this one at a friend's house when doing some housecleaning - and fell in LOVE. This thing got up so much out of allegedly clean carpeting, has great attachments, neat little features like consistent suction (even when almost full!), and allergen filters..... And it works.

Well, I can't find that model locally. I kept starting to order it online and backing off (there are 4 other high-price items I was budgeting for too - we can only get one at a time, about 2 months in between... then I got a bit of a break and I could afford THREE items - and then the computer needed replacement. So the money is finally there again - and I just did it. I bit the bullet. I bought the next model up - it has a lift-away feature so I can even more easily get stairs (I don't have stairs in my apartment, but I'm thinking the car....) and furniture and upper corners, it tilts to get around objects - I am so in love!

It cost more than the repair on the old vacuum, but with so many other features, the fact I've never purchased or paid for a vacuum (only replacement parts - I can replace almost anything on a vacuum at this point - as long as I can obtain the materials: cords, motors, belts, rollers, plastic covers).

I started vacuuming today and it actually left marks in the carpet (you know - brushroll marks - I've not seen those in months and months!) ---- and when I moved a chair (that left footprints in the floor), the brushroll actually pulled up the pile on the carpet so there are NO marks!

Did I mention it is bagless, but empties so much easier than any other bagless I have ever used....


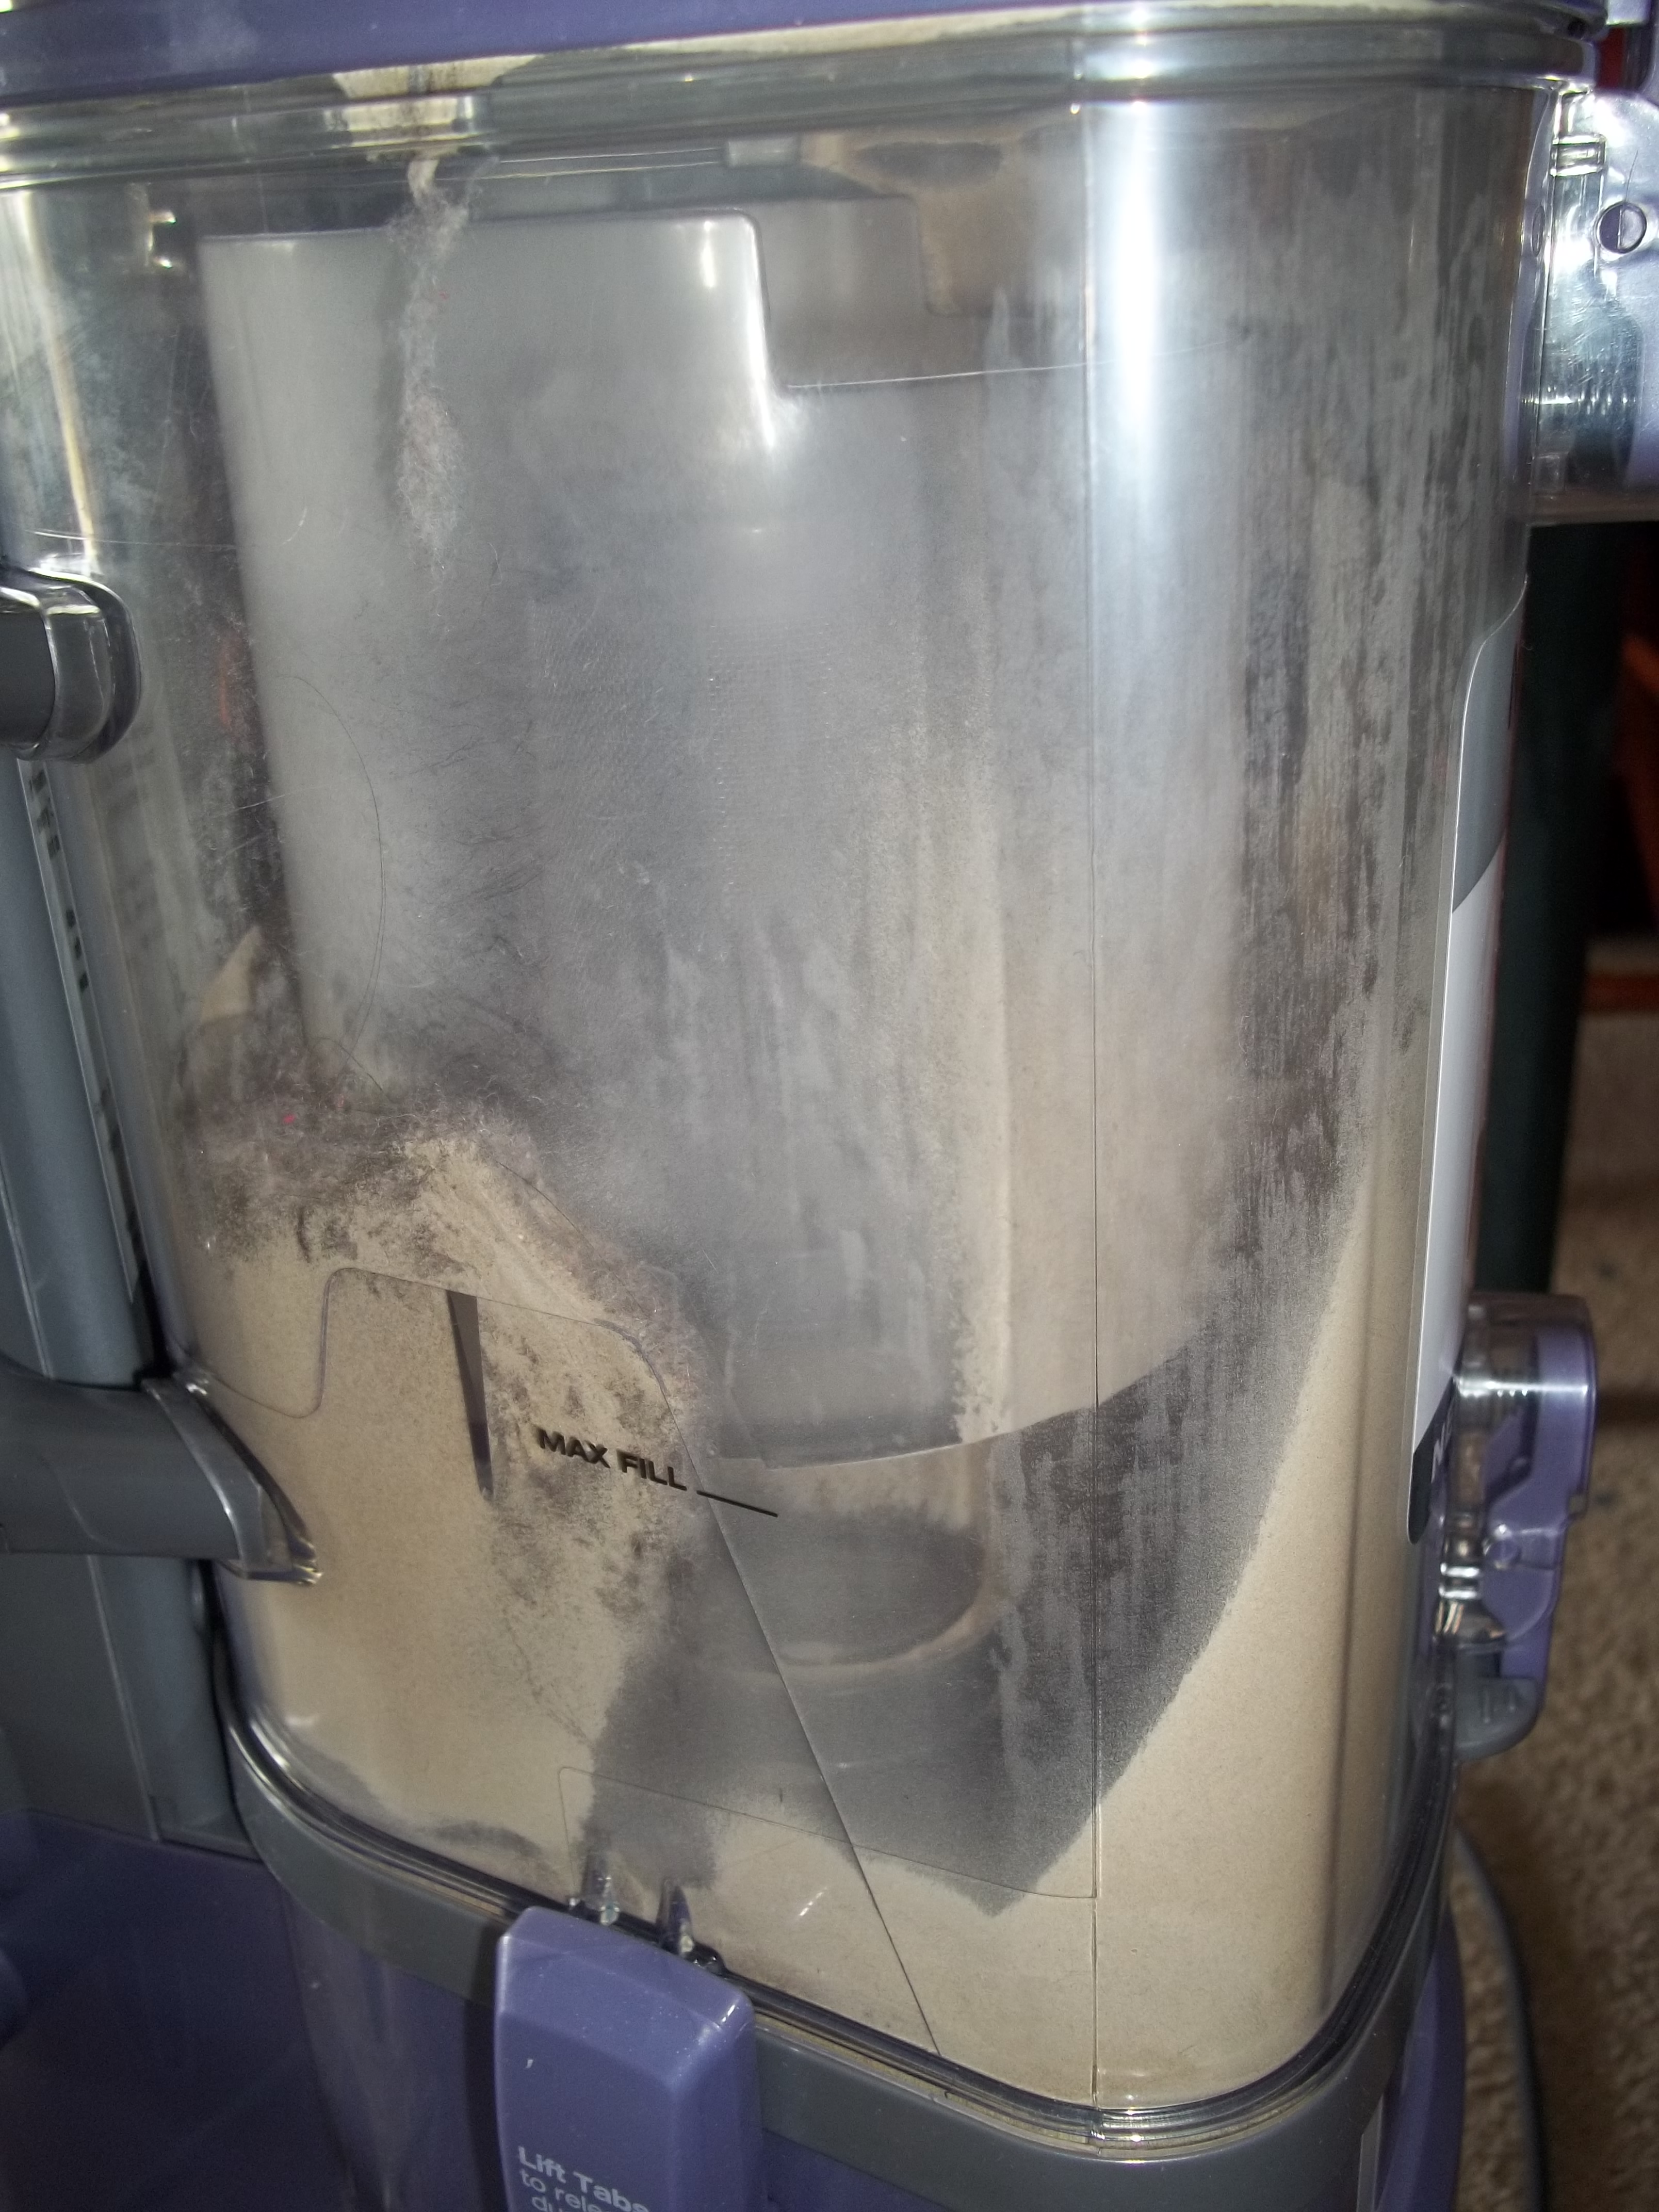
And it cleaned my allegedly clean floor!

[caption id="" align="alignnone" width="417"] This was 3 square feet of allegedly clean carpet. Hm.
Anyway, I REALLY love vacuuming now![/caption]


Wednesday, September 25, 2013

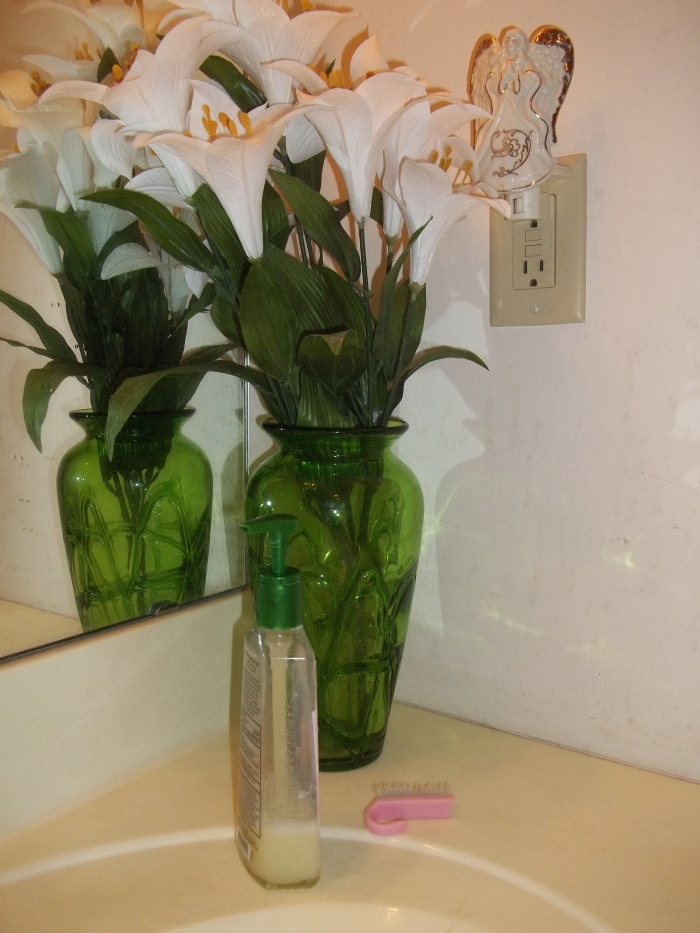
Homemade Hand-Soap

I have been asked a lot lately - now that I've finally found a homemade hand-soap I *really* like -
"Why do I make my own hand-soap when I can buy off-brand hand-soap for so cheap?"


Because it's even cheaper. And could be even cheaper than I do it now.

Because it's FUN! Just enough of a challenge - and a bit of danger (I start from scratch with oils/fats and lye).

Because of the trick of getting just the right essential oils to provide the benefits we want the fragrances we like. (Tea tree oil takes serious getting used to!).

Because I'm not paying for junk: triclosan, fillers, artificial colors, artificial fragrances, alcohol, added glycerin when the full-base soap is more moisturizing anyway, and who knows what else.


For right now, I am still using old pump bottles from Christmas/catechist/Easter/end-of-year-teacher gifts - when these wear out, I'll come up with a more creative solution.


My little corner of beauty and peace:


Wednesday, January 9, 2013

Yogurt and Science

We make our own yogurt and the last few times, we've been using a simpler method that we LOVE - it's so easy!

When removing the milk from the pan and placing the jars on the counter, we always notice the layer of cooling milk on top.

This layer is mentioned in the first Great Lesson - The Story of God With No Hands - right before introducing the volcano... so it can easily slip into the recesses of one's mind when confronted with that *awesome* volcano!

This last yogurt-making was interesting though...

We were both working quietly in the living room and continued to hear a pop - pop - pop. Ever so slight.

Dreading the possibility of a mouse in our apartment, we crept into the kitchen....

and found...

This....

If you listen very carefully you can hear the quiet pop-pops - just barely. There are two other videos as well - both showing the same thing, but we couldn't decide which one to post!

Give it a try! Boil some milk in a glass jar by placing a 75-90% filled with milk jar into a saucepan of water and cover with a lid. Bring to a boil until the milk is about 160 degrees Fahrenheit. Now use a mitt to remove the jar and place it on the counter. Just let it sit. It won't take long!

Neat, huh!?

Wanna make yogurt while you're at it?

If you don't have a nice consistently warm place, do what we do and place that pan of hot water in a cooler which has been lined with a thick towel. Close the cooler for now to get it nice and warm in there.

(if you want to use raw milk and keep it raw, to make yogurt, you'll heat only to 110, but will not get a skin on the milk)

When the milk is about 105-110, mix in a spoonful of yogurt with active cultures. Put a lid on the milk culture and place it in the cooler next to the pan (best not to let them touch if the pan is still too hot - you don't want to kill the yogurt culture). Close the lid.

Come back in 24 hours (usually less but the 24 hours part is easy for us!).

To a pint jar, we add about 1 1/2 tbsp of sweetener (powdered sugar, honey, maple syrup, fruit juice concentrate) and whatever other ingredients you'd like. We are out of vanilla (still waiting for it to finish up) so we've been using almond extract - YUM!

Or mixed with homemade granola. YUMMIER!

It's pretty thick to start, but gets a bit runnier with stirring, so minimize your stirring if you want thick yogurt.

No pectin, no preservatives, our own sweeteners.

AND science!

Can't beat it!

Yes, those are wide-mouth Ball glass jars - we have been slowly switching over to just using those, instead of re-using other glass jars, because, well, we're not buying as many other glass jars as we make more and more of our own food from fresh produce. I chose wide-mouth because 1) the food doesn't clog up underneath a lip and 2) the same lids and rings fit on both pint (think jam) and quart jars - I really need ease of use and mis-matched lids have been hair-pullers in the last year! ;) Now I have multiple sized jars and just one size of lid that fits on all the jars. And everything looks so NICE in the cupboard, fridge and freezer!


After stirring it is just a bit runnier than organic yogurt.

Just as thick as well-stirred non-organic yogurt.


In the cooler; we make 4 jars at a time.

Saving the last half of one jar as the culture for the next batch.

Wednesday, December 26, 2012

Sourdough Cinnamon Rolls

Well, I finally did it. I FINALLY made something with all that sourdough I previously got started.

I'd intended to use it then, but sickness and work and other stresses got in the way, so it all sat in the fridge. I even forgot to FEED the stuff!

So Christmas Day, we pulled it out and started playing with it. It all came back and fairly quickly, so 2 months gone is not actually gone ;) Yay!

I decided that because I had the "main jar" for each type (I have 2 types); plus a back-up jar for each one; PLUS a peanut butter jar of each one (each jar is half-full), I would just resuscitate them 2 jars at first - see if it works. If it does, save some of THAT for the "main jar" - then resuscitate all of the rest and just bake it ALL up.

The thing is, so many of the sourdough instructions instruct you to toss out half of it at each feeding. That is SO unnecessary. if you start with a tiny amount to maintain, you can quickly double that and put your original back in the fridge, while working with the "doubled" part that would have been tossed out and turn THAT into whatever you're making. I understand the need to halve it and feed it so that it doubles again - in order to prevent the acidifying. Got it. But all that sourdough down the drain? All those good bacteria and yeast and ALL THAT FLOUR (I see wasted $$$$) down the drain!? NO way, buddy! Not in THIS household!

So. That means - we have a LOT of baking to do.

One of today's projects: sourdough cinnamon rolls.
BACKGROUND: If I've ever made cinnamon rolls before I don't remember - and it would have been with someone helping (ahem - directing!) me. I don't think I added near enough cinnamon and sugar inside....

BACKGROUND 2: these are sourdough cinnamon rolls and probably needed more than the usual amount of cinnamon/sugar to make up for it anyway.

BACKGROUND 3: This is my first time making ANYTHING with sourdough. Definitely need more practice, but a worthy first time!

[caption id="attachment_1031" align="aligncenter" width="300"] Not enough filling, I'm thinking. I added a BIT more after this photo.[/caption]

[caption id="attachment_1032" align="aligncenter" width="300"] Risen and ready for the oven (we actually had two pans - the other is a small square) - boy did they rise!!![/caption]

[caption id="attachment_1034" align="aligncenter" width="300"] MMMMMM..... Looks SO GOOD![/caption]

VERDICT: not near enough sugar and cinnamon. (so we doused the top of the still hot glaze with a LOT more cinnamon - definitely delicious now!!! Next time, I'll have to play with the amounts on the inside. I DO think that our sourdough was probably a bit over-sour for this particular recipe. I'll use a more stable batch next time.

Legoboy is begging for more - I'd best go make sure he doesn't eat the whole pan!

I will definitely make these again, with the noted modifications. I just LOVE how active this sourdough is, even after 2 months of not being "fed". It is so much healthier, feels more "real" to me so is a spiritual boost, and I just don't think I'll go back to "baker's yeast" again (it just doesn't do well in my gut area, 'nuff said ;) ).

UPDATE: My mom mentioned brown sugar. I used our cinnamon-sugar mix and then added more cinnamon; which obviously wasn't enough. But I bet the brown sugar would have helped ;)

Saturday, December 1, 2012

Best Homemade Frosting!

If there is one thing I need with any recipe in this household - it better be EASY!

I have never held "exactness" high on my list of things to be appreciated - especially when it comes to food, cleaning and organization. Flexibility - yes! Now there's a word I can put on the "appreciative" list!

And this recipe cuts to the heart of it - it is easy on the budget, easy on the need for not one drop of high fructose corn syrup,  easy on sweet cravings, easy to modify and so easy I've never written a recipe card for it!

I just made a batch sitting at the computer - my son brought me the ingredients and I mixed it up (he could have too - but I munched while mixing ;) ).

Take a block of cream cheese (ANY amount will do) - drop it into a bowl (the bowl in my photo was a bit too small for the 3/4 block of cream cheese I had). Let it come to room temp. When it is close to room temp you could microwave it for just a few seconds (yes, this is one of those rare times I *might* go turn the circuit breaker on for the microwave and use it for the 15 seconds).

Once warm, add in an equal amount of powdered sugar. A tsp of your extract of choice (tonight was almond extract - we've also used vanilla extract) - or larger proportions of other flavors, in quantities to suit your taste: cut up strawberries, 1/4 part powdered cocoa (or melt some chocolate into it), peanut butter in varying quantities - whatever YOU want.

[caption id="attachment_1004" align="aligncenter" width="300" caption="unmixed - almond extract, sugar and cream cheese!"][/caption]

Stir to your desired consistency. The thing with cream cheese is that it is hard to stir until the powdered sugar is mixed into it - so start with the powdered sugar and pull in sections of the cream cheese at a time - or just use a blender (lick the beaters!!!).

[caption id="attachment_1005" align="aligncenter" width="300" caption="ready to go!"][/caption]

MMMM. Yum!

Spread on your serving platter of choice - tonight will be homemade, gluten-free pumpkin bread (we ran out of glaze for it so we made the frosting to put on our slices ;) ). Graham crackers, muffins, cupcakes - or whatever you like!

Now, this version is not particularly overly sweet - it will NOT be as sweet as the hot fudge topping ;) The nice thing though is that you can mix up this basic batch - starting with the minimal of flavorings and sweeteners - and increase your sweeteners and flavoring in small quantities until you reach the amount you like. Then just make a mental note of how you liked it and make it that way later! For example, if I want something sweet, I will do the sugar about 1 1/2 times the amount of cream cheese. Or I will do slightly less and add some honey. Fruit always makes it sweeter.

You can also substitute apple juice concentrate (easy equivalence: 3/4 cup of any juice concentrate is equal to 1 cup of sugar) - but it makes it runnier, so this is best done if you're going to be adding other dry or thicker ingredients - like cocoa and peanut butter ;)

Yes, I am making my own cream cheese upon occasion, but whenever it goes on sale for $1/block or less, I buy it - organic or not! Frankly, it's just better on the TIME budget that way! But any more than that and I make it.

Tuesday, November 27, 2012

Hot Fudge Topping - NO HFCS

Hot Fudge ice cream topping - or by the spoonful ;) (sh - I won't tell!)

I have really enjoyed the chocolate syrup recipe I discovered a few years back, but tonight I was in the mood for something different - thicker - gooier - hot fudge topping!

But there is always the dreaded high fructose corn syrup. Sigh.
I have come to the conclusion that such concoctions as HFCS are poison to ALL human bodies; it is just that some bodies can cleanse themselves better. When I have it tiny quantities (and not within about 9 days before the start of my cycle), I do just fine - maybe *slight* fatigue. Any more than that, and I am fatigued like I've someone unplugged the energy plug from me - like a deflated basketball. Thud.

So I started the dreaded web search - how long would it take me to find the perfect recipe?

  • NO HFCS.

  • Simple to make - even my son could make it.

  • Few ingredients - and all-natural. (white sugar is ok)

  • Ideally pure ingredients - as in the ingredients listed are just one ingredient by itself (for example, "bittersweet chocolate" has more than one ingredient, so that wouldn't work - see, then I'd have to check THOSE ingredient lists and that's just getting too much for what should be simple and basic)

  • And it had to end up being cheaper than buying all-natural at the store (I am good with it being it more expensive than the HFCS-laced stuff if necessary)


Was there ANY hope for me!?

I FOUND IT!!!!


http://www.foodess.com/2011/08/cocoa-hot-fudge-sauce/

Cocoa Hot Fudge Sauce


  • 3/4 cup sugar

  • 1/2 cup cocoa

  • 1/2 cup heavy cream or milk

  • 4 tbsp butter

  • 1 tsp vanilla

  • pinch of salt


1. In a large microwave-safe bowl, combine sugar, cocoa and cream. Cook on high 2-3 minutes, until sugar dissolves and mixture boils.

2. Stir in butter and cook on high 2-4 minutes more, watching closely and stirring every 30 seconds or so, until mixture thickens. Stir in vanilla and a pinch of salt.

(I made mine on the stovetop - obviously ;) - see images)

[caption id="attachment_991" align="aligncenter" width="300" caption="That is an 11.5 oz jam jar of hot fudge sauce - completely full - and then some in the pan (we'd already eaten some on a bowl of ice cream each - so perhaps 14 oz altogether? with some left for scraping ;) )"][/caption]

[caption id="attachment_992" align="aligncenter" width="300" caption="Trying to show the thickness - I think a video would be needed for that though!"][/caption]

This stuff is SO DELICIOUS! I think I should boil it a bit longer to get it thicker, but as it cooled (still warm) it was quite thick already (please note, I did not boil it as long as the recipe says - I should have!). I was still separating turkey meat from bones in between making this hot fudge topping that the hot fudge was done before I was! It was THAT EASY!

Legoboy is already making plans for the jam jar we have so we can use it up and HE can make it ;) I think I'll have him add about half cup of peanut butter to it too next time - just for kicks!

(ETA: If you add peanut butter, decrease the regular butter by something - not sure how much - we did make a second batch - and the regular butter has separated out - probably too much oil from the butter AND the peanut butter together).

(I suppose I should note that most of these posts are scheduled out in advance - I sit down and write a bunch of posts in half an hour and schedule them out - so no, a week later I am NOT still caring for the Thanksgiving turkey ;) By the time you all read this, the turkey is safely in the freezer (or consumed! yum!))

Sunday, November 25, 2012

Use it up!

Otherwise known as "waste not, want not." God instructs us to be stewards over the earth:
God blessed them, saying: Be fertile and multiply; fill the earth and subdue it.

With these words, we are given the gift of God's own work. Not a one of us is worthy.

In exploring these themes in the CGS atrium, in our Bible studies and in our prayer life, my son and I have been doing all we can to use the gifts with which God has blessed US. Carefully, judiciously, always putting relationships with people first.

Well, in the food world - I got brave this year. And I cooked up the turkey gizzards too. In past years I have saved them for other people. I still had two packages in the freezer from several months ago, so I added them too. Wow, that was a LOT of meat! By the time I cooked it all down and shredded off all the meat from the next, that was more than enough for the gravy, but I kept going! I chopped up all the parts and mixed them back in, except the liver which I tasted and still couldn't stand (a stray piece still got in and I had it in leftovers on Saturday - even with lots of water and lots of delicious leftovers, it still left a nasty taste in my mouth for about 2 hours). So that is back in the fridge for something else (I'm up for ideas!).

And oh MY! Did the gravy have way too much meat (keep in mind this was gizzards times 3 ;))

[caption id="attachment_986" align="aligncenter" width="300" caption="This is room temp - so congealed, but it's barely runnier as warmed up gravy! "][/caption]

[caption id="attachment_987" align="aligncenter" width="300" caption="Small pot: rest of the neck bones; large pot: rest of the turkey bones"][/caption]

Yes, that is a plastic bin for the turkey you see - it is one of two last pieces of plastic in my kitchen (my spatula handles are a hard rubber; as is the bulb on my baster; all bowls are metal or glass --- but I do have a plastic lid for a small rectangle glass baking dish into which I put slightly warm or room-temp items for transport). This is a tupperware measuring container with a pour spout, with a lid that has a little flip-cap for the pour-spout. It was (my maternal) Grandma's and I have fond memories baking with her as she used this for measurements... I only put in the gravy when it is warm, not hot or boiling, to minimize plastic exposure and I usually use it for pancake batter - it's perfect for my son to mix up the batter in and use to pour onto the griddle (see previous pancake post!).

So we're boiling down the rest of the bones to get all the rest of the meat bits - and to get some turkey stock to freeze for future use. I love my pint and quart mason jars! I've started using them for everything, even though I have a cupboard full of peanut butter, jam and sauce jars! Probably because the  mason ones can seal more properly; and I'm not purchasing jam and sauces anymore anyway (still some peanut butter because we can't seem to get any allegedly raw peanuts to sprout - more on that another day!).

The remainder of the bones then can be used in our homeschooling for a variety of purposes (science and art come to mind - anatomy, parts of the bones, archaeology), but I am entirely up to more ideas!

Friday, November 23, 2012

Yum - Pancakes and eggs

Made by the most beautiful boy alive!


Yummy eggs (once cooked fully ;) ). Our griddle requires a lid to be held over the eggs to cook the tops without cooking the centers - not a big deal, if not what I expected.


2 years ago I bought this HUGE bottle of syrup. Despite the fact that we use a LOT of syrup, we've not gone through it. Now, we still had 3 or 4 glass bottles (see left) to use up before we got started on the large bottle. Now I just wash out that glass bottle, transfer as needed from the large jug; and the large jug can be stored in the back of fridge out of harm's way. I have read about concerns about the age of the syrup - but if you keep it air- and moisture-tight, nothing has a chance to grow on it because of the relatively low water content. AND if something does grow on it, you can scoop it off and the rest is untouched. I've not had to do that with this syrup - but with other things in that past I didn't care for properly ;)

These pancakes turned out a bit thicker than usual. Probably because of the powdered milk rather than liquid (and usually raw) milk we usually use - but he added a bit more liquid, so I don't know.

In any case, breakfast was QUITE delicious! All I had to do was keep things cleaned up so our kitchen can stay consistently tidy. And he still made it to class on time that morning ;)

Yay!

Tuesday, November 6, 2012

Sour dough... mmmm....

Several months ago, a friend from our church offered us some goat milk - fresh - raw - YUM!!!! We made yogurt and cheese and just LOVE IT!

This same friend also offered goat milk to another friend we have. He and his girls were supposed to make yogurt or cheese or something with it - he even went to the store and tried to buy cheesecloth (I ended up giving him some muslin). I recall they did do something with it all, but I don't remember what... ?

I do recall that he left it in the fridge so long (a habit over there) and it started to go sour. So he got this brilliant idea (hey, I may have thought of it too if I didn't know any better, so please excuse my sarcasm here ;) ) that one goes about making "sour dough bread" with "sour milk".

Ahem.

(that would be a "no")


So anyway. He went to the library and checked out books on how to make yogurt and cheese and... sour dough bread.Now, in his defense, there are people in our area who "make" "sour dough" bread but it is NOT sourdough bread. There is a huge difference. A huge historical difference, a huge health difference, just a HUGE difference!

Well, first off, those books overcomplicated the entire cheese and yogurt process. I gave him a stripped down version of those processes and he made a few things with success.

He did learn that one does NOT use sour milk to make sour dough bread - and that sourdough bread is actually one word on the "sourdough". He did not like the book and wanted to get rid of it right away. I convinced him to let me finish reading it first.

[caption id="" align="alignnone" width="239"]Classic Sourdoughs - A Home Baker's Handbook He had checked out the older edition of this book.[/caption]

I fell in love with the book! Went to the website and months later finally bought some of the sourdough starter in powder form... and it sat in my fridge until I could get jars. Then it sat in my fridge until I cleaned those jars out and went looking for the instructions (never did find them). Then it sat yet another week until I finally went BACK to the website to find that the instructions were included there for free. Yay! So 9 months after discovering it, and 6 months after purchasing the starter, I was ready!

[caption id="attachment_962" align="aligncenter" width="300"] Here they are at first feeding - just getting started :)[/caption]

[caption id="" align="alignnone" width="185"] One of the jars after the second feeding (had it started; then 24 hours in added a feeding - this is the following morning; when the other one exploded - leaking sourdough all over - AWESOME!)[/caption]

[caption id="attachment_964" align="aligncenter" width="300"] I awoke to what sounded like a mouse having a feast on Halloween candy under our dishwasher. It turns out to be the sourdough starter oozing, bubbling and otherwise popping out the sides of the loosely attached lid! Very funny to see! Not so funny to have lost sleep over it! [/caption]

[caption id="attachment_965" align="aligncenter" width="300"] Scooping from one jar to another - as runny as it looks, that is actually sticking together quite well![/caption]

And it's ALIVE!


I have moral issues with tossing the halving down the drain - so it's being split into multiple jars until I get a chance to bake with it. I should bake with it NOW but I want to experiment first ;)


Saturday, November 3, 2012

FlyLady and Catholic Hearts

Well... several years later, I have some updates....

First, several years ago, I tell in love with FlyLady. I knew there were areas we couldn't agree - and gray areas as well. But I worked it out. Instead of 5 areas of the house, I have 4 (I hve a much smaller home - and I look forward to those 4 weeks each year that are the "fifth week of the month" ;) Freebies!

The shoes thing.... It has always irked me. To no end. I couldn't just disagree and call it good. I think it is a rotten idea!

http://www.flylady.net/d/getting-started/fly-faq/#shoes

Based on her reasoning, the only reason I as a stay at home mom would want to keep my shoes OFF is because "only the kids will see me".

(please note when reading this list, when I first found FlyLady I was doing an in-home daycare)

Well..... I keep my shoes OFF at home for the following reasons:

  • so I can feel like I am at HOME.

  • so no gunk is being tracked in for babies to crawl through

  • so I can BE on the floor with the children

  • so the children can spread out a blanket and nap on the floor

  • so my overnight children can roll off their mats onto the floor and be on clean carpet

  • so I can keep my carpets cleaner - less time and money spent on cleaning (isn't this why I was doing FlyLady to begin with !?)


Ok, indoor shoes might work - then change to outdoor shoes.

Or not:

  • baby fingers on the floor - crawling - playing

  • with no shoes on at all, I can feel the carpet, I can feel the small items that fall and might choke a child, I will feel a baby's finger before stepping on it just too hard (yes, I should see the baby as well, but there ARE fast babies - and if I am carrying one across the room in a hurry (leaking diaper, vomiting baby), well, there just ARE situations where you see the baby but not the fingers.

  • I am a calmer, more relaxed person without shoes on. I am at home. I am WITH the PEOPLE.


She also uses the reasoning about being a professional. Professional swimmers don't wear shoes when doing their jobs ;) Jokes aside, I am a mom, not a professional. I am ok with dressing neatly, brushing the hair (I don't wear make-up, even in truly professional situations, so I won't do it at home), always being ready to greet someone at the door - those things I am good with.

But I don't want shoes in my home. And for those people who stop by just for a few minutes so don't want to take shoes off? Well, it's those first few minutes when the most gunk falls off your shoes onto my carpeting and flooring - and I have the most cleaning up to do when you leave.

That is not me being mean or rude or obnoxious or controlling. That is me being realistic and asking for a little respect in my own home. I have only ever had issues with four people: a firemen who had to do a safety inspection for daycare purposes and the daycare inspection lady (both of whom put plastic bags over their shoes while walking ; my son's godmother (go figure - we love you anyway!); and the man I was courting for a year and a half (he was so used to wearing his shoes non-stop in his own home because of having a cat that vomited and pooped EVERYwhere) - and while he tried SO hard to be mindful of my requests, habits over-ride. And stuff was brought INto my home FROM his home via everyone's shoes that I won't even describe here. Ew.

Sorry FlyLady. No shoes in this home!

(and yes, when I can get away with it - no shoes OUTside either! ;) Easier to clean off feet before coming in, than it is shoes)

Wednesday, October 24, 2012

Homemade Vanilla


The resident child (hehe) has been studying a bit about herbs of late. And it has been on our plans to make homemade vanilla extract for quite some time.


Obviously, not something he can do on his own... He can cut the beans, he can drain the extra fluid, he can drop in the beans, label it all and seal it up, he can store it.


But I had to make purchase. My first alcohol purchase of my life! The things we do for our children! It does seem ironic I just purchased an alcohol for my son, though!


(for the record, I am not opposed to alcohol, I just don't tout it or drink very much, and I have not had a reason to purchase it before now.... wait.... when I lived in Belgium, I bought some wine to bring home to family, but that was a different culture - alcohol was out with the sodas!).


Grandma was given this kind of rum/vanilla; and we

were so happy to find it stocked at Kroger.

It has fantastic flavor, so we are excited!

The beans we purchased from Mountain Rose Herbs:

http://www.mountainroseherbs.com/search/search.php?refine=y&keywords=vanilla&x=0&y=0

We have the "1oz Vanilla Bean organic and fair trade" and it smells right! ;) I do wonder if we got quite the driest beans (apparently you are supposed to use grade B beans - but I also wanted fair trade, etc). These seemed more most than I anticipated. So we'll see. Either way, it will work from what all sources say - it's just a nuance ;)

He has been looking at the history of the use of vanilla - and true to Montessori style, we want to look at the PEOPLE involved. Most fascinating is that a 12 year old child worked out how to hand-pollinate the vanilla so that it could be grown outside of the Latin America countries.

Forget gold and corn and other such things - the greatest gift that the Europeans found in the Americas: VANILLA!

Ever had chocolate without it?

We did! Never again, thank you!


Vanilla brought chocolate to the impoverished Europeans! And now they make the best chocolate in the world. One plant changed the world! One little boy's discovery!


Tuesday, October 23, 2012

Drying Mint

We are trying to be good stewards of the earth, while not letting the earth get in the way of the most important gift of human beings: relationship.

It is even better when the two are the same thing :)

In this case, we are growing mint in our living room. As it grows long, we trim it, hang it to dry, grind it up and make tea... and more... While it is drying (upside down so the oils flow back into the leaves, maximizing their potential), we have a beautiful decoration that makes our home, truly homey. Comforting. And there is a natural inclination towards being with one another in a cozy, homey home ;)

Once it is fully dried, we spend time together pulling the leaves off into a large bowl (easier to collect everything then, transfer in small quantities to the mortar and pestle). I bought a set of 3 of these on Amazon years back (affiliate link there) that have been simply fantastic!

The mint leaves are stored in a jar to use for making tea, or to add to our homemade toothpaste or anywhere else we need some mint flavoring.

That leaves the stems - which are fine for adding to the composting, but well, we have an interesting set up with our apartment management and mouse-traps get pricey when management does little to alleviate the issue. But fresh mint keeps them away.

My mother will cringe when she reads that I tuck these stems in all the places where the mice have been spotted. Despite her cringing, I can confidently report success (so far!) - ice-free and my home smells so nice! We freshen them up when we harvest new mint and THEN we compost the stems. There may be other purposes for them, but that is what we do for now :)


mint, dried, laying on the stove

because our counters were full at the time.


grinding mint leaves with mortar and pestle

Saturday, October 20, 2012

Canning - woohoo!

I finally got to do some canning this summer!

Lots of jam at great-Grandma's house; and lots of applesauce at home.

It's SO pretty!

I did not use the smaller jars that are typically used, but wanted the larger pint size with wide mouths, so they have not "lip" inside to catch all that good yumminess!

I then got a few quart size jars to get the starter going for REAL sourdough bread. It is supposed to be healthier and maybe it won't make my abdomen bloat like store-bought yeast does! We'll see! (photos to come later!)

[gallery link="file" order="DESC" columns="2"]

Friday, October 19, 2012

Once a Month Cooking - October

I have been serving as test cook for http://onceamonthmom.com - and we LOVE so many of the foods.

I like having the recipes all laid out for me, with instructions and a complete shopping list.

As a user of the site, I can just follow along and at the end of the day, I have more than a months' worth of food in my freezer and fridge (we make 4 servings, thus doubling up - 1 month of cooking usually lasts us 3 months, with our typical fill ins of peanut butter and jelly, other favorite foods, visiting elsewhere, and our other favorites).

As a test cook every few months, I get to make sure all amounts and instructions are correct for YOU the end-user.

I never do take as many photos as I intend to. The cooking is pretty intense - and so satisfying when it is done!

[caption id="attachment_923" align="aligncenter" width="225" caption="breakfast cooking - these sausages were SO YUMMY! Definitely a "do 'em again, Mom!""][/caption]

[caption id="attachment_925" align="aligncenter" width="300" caption="MMMMMMM........ (ok not so mmmm when raw; but they turned out fantastic!)"][/caption]

[caption id="attachment_924" align="aligncenter" width="300" caption="In-progress"][/caption]

[caption id="attachment_926" align="aligncenter" width="225" caption="Peanut Butter Hummus - my son pointed out the layers, just like the layers of the earth and the density of liquids - so we had to take a photo!"][/caption]

Tuesday, September 25, 2012

Fruit flies. BLECK.

I am in crisis mode here.

(post written on Sunday, will be listed on Tuesday - will anything have changed in the meantime?)

Seriously!? Almost THREE weeks of these things!

They are everywhere!

And I can't get rid of them fast enough. I have cleaned and scoured everything; been evil with my son for not putting dishes away properly and keeping food out of our living room (we have to eat in our living room - it's how our apartment is set up - the trouble is the boy-mess and "forgetting" to bring the dishes back into the kitchen.

As I estimate I have killed (slaughtered!?) over 500 in the last 5 days alone, I start to wonder - is this the Christian thing to do? Kill God's *innocent* creatures.

And then one flies into my face again, or there are about 75 covering the microwave door and I think, "They're not innocent!"

And THEN I think, "But only human beings have the capability of being innocent or guilty as we have reason and a free will."

But that only leads me back to, "Is it right to kill these creatures who are only following the laws that God gave them?"

Don't get me wrong - I would rather play the Pied Piper and lead them out (without the drowning part at the end), but I tried that and failed.

So they get the apple cider vinegar version of the Pied Piper, with drowning.

SIGH.

I so have other things to do! And I am contemplating the morality of killing fruit flies....

[caption id="attachment_901" align="aligncenter" width="169" caption="Fresh cup of vinegar cocktail (apple cider vinegar with a drop of dish-soap)"][/caption]

UPDATE -

[caption id="attachment_913" align="aligncenter" width="219" caption="24 hours worth of fruit flies. Hardly makes a dent. And that's a 3/4 inch deep pile. SIGH. "][/caption]

Thursday, July 26, 2012

Out of chocolate syrup...

When you're out of homemade, HFCS-free homemade chocolate syrup, but you need a fix for your ice cream....

one spoon of sugar...

one spoon of powdered cocoa...

and a few drops of vanilla...

Add the ice cream.

MMMMMMMMMMMMMMMMMMMM................................

;)

(notice the lack of photo of the ice cream! It's GONE!)

Wednesday, July 4, 2012

In Full Bloom: Our Balcony Garden

Ok, two things are in bloom!

But it's ALL so beautiful!

(note to Grandma: please click on each image to see it full-size - the settings here cut down the photos) :)

[gallery order="DESC" link="file" columns="2" ids="834,835,836,837,838,839,840,841,842,843,844,845,846,847,848,849,850,851,852,853,854,855,856,857,858,859,860,861"]
Enhanced by Zemanta

Saturday, March 10, 2012

Cream Cheese - Homemade

Ok, I finally hit sticker shock on grocery prices. $2.04 for one little thng of cream cheese???? I don't know what it was previously, because I always bought it when it was $1/packet on sale.

And Kroger has the nerve to label that $2.04 "Low Price".

Note: "Low Price" at Kroger = they've recently *raised* the price. Problem is, it's the same color as their sale price stickers.

SO. We're making one more thing at home. And this one is EASY-EASY-EASY!!!!! The KIDS can make it!

TOOLS:


  • Pot on the stove; or crockpot; or bring everything to room temp in closed containers

  • wood spoon

  • colander

  • bowl into which the colander fits

  • muslin cloth or cheesecloth or buttercloth

  • containers in which to store your yummy cream cheese (we use glass jars)


INGREDIENTS:


  • 1 quart fresh milk

  • 2 teaspoons salt

  • 2 tablespoons white vinegar


Directions:


  1. Bring milk and salt very slowly to a boil (or bring it all to room temp in closed container.

  2. Remove from heat and stir in white vinegar (this makes the curds separate from the whey).

  3. Leave to cool (if heated).

  4. When cool pour mixture into a muslin bag and allow to drip. You can also wrap it up and squeeze.

  5. The whey is collected in the bowl - store this separately.

  6. The cream cheese is at its best if you place it all in a food processor or blender for a few seconds (add tiny amounts of whey at a time if it's too dry).

  7. Store in small containers in the fridge. Use within the time your milk would have expired.


Whey: Can now be used as buttermilk or in other recipes (pancakes! or anything calling for milk where you don't need too much fat)

Cream Cheese: Can have other flavorings added for a variety. Experiment!

Sunday, January 22, 2012

Game Day Sunday

In trying to fulfill my son's needs for competition, challenge, strategy, sportsmanship and all those other more "fatherly" tasks, I found a really great solution: GAMES. Variety of styles, variety of content, NO technology (this is counter-productive in the attention and attitude areas), lots of strategy, lots of togetherness, lots of fun, lots of learning how to HAVE fun when the game is going strongly against you).

~~~~~~~~~~~~~~~~~~~~~~~~~~~~~~~~~~~~~~


[caption id="attachment_650" align="aligncenter" width="300" caption="Games played this past week"]Games We Play[/caption]


We have been playing a LOT of games lately. In fact, I've been counting a lot of it as school: logic and mathematics being the main two subjects. But also strategy, planning, fair play, agreement to new rules (see our post on Monopoly Deal - it's mildly better now).

~~~~~~~~~~~~~~~~~~~~~~~~~~~~~~~~~~~~~~

I've tried to make time every day for at least one game of his choice as well as Sequential Shake-a-WFF (I get too impatient with his style of Competition Shake-A-WFF).

~~~~~~~~~~~~~~~~~~~~~~~~~~~~~~~~~~~~~~

One of the Great-Grandmas sent us a Christmas check and said, "Spend it on something you want." I called her to say that I wanted the bills paid, and she said, "You *know* what I mean young lady!" (hehe - I'm still a "young lady" - hehe)

So with it, we went to Once Upon a Child and bought a really cool set of pjs for the boy - yeah, he looks spiffy (and he actually *wears* pajamas now!) --- and we browsed the game selection.

~~~~~~~~~~~~~~~~~~~~~~~~~~~~~~~~~~~~~~

OH! My! The game selection was HUGE, but mostly for littler ones (given the nature of the store, that's understandable). We picked up


  • Zooreka (bit of a disappointment - says 8-adult; I say 4-7; it's no longer listed on their website and has bad reviews - probably because everyone expected a higher level game. It's a *great* game.... for 4-7 year olds).

  • Clue - the only disappointment here is that he learned the strategy so quick, there's little to learn --- so we'll pull this out when we have visitors - that's a different strategy set!

  • (we still had money left so he bought 10 pounds of clay at Hobby Lobby - a post for another day! On HIS blog!)


~~~~~~~~~~~~~~~~~~~~~~~~~~~~~~~~~~~~~~

So today (Sunday), we were iced-in (my car is encased, it is supposed to warm up tonight and Monday, so I wasn't going to spend an hour scraping ice -- besides the apartment management never salted the parking lot and people were sliding all over - and one of the management employees even "visited" this afternoon - and still nothing was done. Ah well.) SO. We had a game day. Almost nothing but games.

~~~~~~~~~~~~~~~~~~~~~~~~~~~~~~~~~~~~~~

He was in Seventh Heaven! He's been hoping for this for a long time! He set up all the games and we have been rotating around through them. But despite my Facebook status, we have not yet made it to checkers (we still might).

~~~~~~~~~~~~~~~~~~~~~~~~~~~~~~~~~~~~~~

Instead, we started making soft pretzels:


[caption id="attachment_649" align="aligncenter" width="300" caption="Mixing up the pretzels"]Mixing-pretzels[/caption]

~~~~~~~~~~~~~~~~~~~~~~~~~~~~~~~~~~~~~~

I smell them rising as I type this..... MMMMMMMMMM!!!!!!!!!!!

~~~~~~~~~~~~~~~~~~~~~~~~~~~~~~~~~~~~~~

~~~~~~~~~~~~~~~~~~~~~~~~~~~~~~~~~~~~~~

UPDATE:

[gallery link="file" columns="2"]